How to setup UTM, rules & labeling
Best Practices for Marketers on UTM Parameters: Using Lifesight’s Rules & Labels
If you're a marketer, you've likely encountered duplicate or skewed attribution reports due to inconsistent or incorrect UTM parameter naming conventions. This can lead to messy data and misinterpretations, making it harder to assess the true performance of your marketing campaigns. But don’t worry — Lifesight’s Rules & Labels feature makes it easy to clean up and organize your data, ensuring your reports are accurate and easy to interpret.
Why Do Inconsistent UTM Parameters Cause Issues?
UTM parameters play a critical role in tracking the performance of your marketing campaigns. However, when they’re not used consistently, you can end up with multiple variations of the same source or medium (e.g., Facebook vs. facebook), leading to duplicate data in your attribution reports. This can skew your analysis, making it difficult to assess how well your campaigns are actually performing.
Introducing Lifesight's Rules & Labels
Lifesight’s Rules & Labels feature, found in the Settings page, allows marketers to take control of their data by defining custom rules for grouping, labeling, and even excluding channels. This makes it easier to organize and clean up your attribution data, so you can focus on meaningful insights instead of messy data.
Key Features of Rules & Labels
-
Group Channels: Create rules to group similar channels together. For example, if you have multiple variations of the same UTM source (
facebook,Facebook,FB), you can group them under a common label. -
Label Channels: Apply custom labels to channels based on UTM parameters or campaign hierarchy data. This allows you to categorize channels in a way that aligns with your marketing strategy.
-
Exclude Channels: Remove channels that you don't want to include in your attribution analysis. This is especially useful if you have outdated campaigns or irrelevant sources of traffic that are skewing your data.
-
Custom Rules Based on Data Points: You can create rules based on UTM parameters from the events table or on campaign hierarchy data (such as Objective, Campaign Name, Ad Set Name, or Ad Name) from the ad insights table.
Example Use Cases for Rules & Labels
-
Cleaning Up Inconsistent UTM Naming: Let’s say your team has used different versions of a UTM source for Facebook (
Facebook,FB,facebook). These inconsistencies can fragment your attribution data. By creating a rule in Rules & Labels, you can group all these variations under a single label, such asFacebook, ensuring a unified view of your campaign performance. -
Labeling Campaign Hierarchies: Suppose you run a complex set of campaigns across multiple channels, each with a different objective and ad set structure. You can use Rules & Labels to group your attribution data based on specific campaign objectives or ad sets, allowing you to drill down into the exact performance of specific marketing goals.
-
Excluding Irrelevant Channels: Over time, certain traffic sources or campaigns may become irrelevant to your current analysis. For example, if you no longer run Google Display ads but they are still being tracked in your attribution reports, you can exclude these channels with a rule, keeping your data clean and focused on active campaigns.
How to Use Rules & Labels in Lifesight
Step 1: Navigate to Rules & Labels
In the Lifesight platform, go to Settings → Rules & Labels to access the feature.
Step 2: Create a New Rule
To create a new rule, click the Add Rule button. You can define the following:
- Group by UTM Parameters: Use UTM parameters like
utm_source,utm_medium,utm_campaignto create rules for labeling or grouping channels. - Use Campaign Hierarchy Data: Utilize data from the Ad Insights table, such as campaign name or ad set name, to define more detailed rules.
Step 3: Define Your Rule Criteria
Select the criteria you want to use for your rule. For example, if you want to group all traffic sources containing "facebook" into a single label, you can create a rule that looks for any utm_source containing "facebook" and groups them under the label "Facebook Ads."
Step 4: Label or Group Channels
You can choose whether to label or group the channels based on your criteria. For instance, you might want to label a set of traffic sources as "Social Media" or group all variations of a campaign under a single name for easier tracking.
Step 5: Exclude Channels (Optional)
If you wish to exclude certain channels from your attribution analysis, you can add a rule to remove them. This is particularly helpful when cleaning up outdated or irrelevant data.
Step 6: Apply and Save
Once you’ve defined your rule, click Save. It may take a few minutes for your new rule to be applied across the dashboard. You can toggle rules on or off as needed.
Example: Grouping UTM Sources with Rules & Labels
As can be seen in the following example, there are multiple utm_sources for Youtube influencer namely: Youtube_Influencer Youtubeb_Inf Youtube_Inf
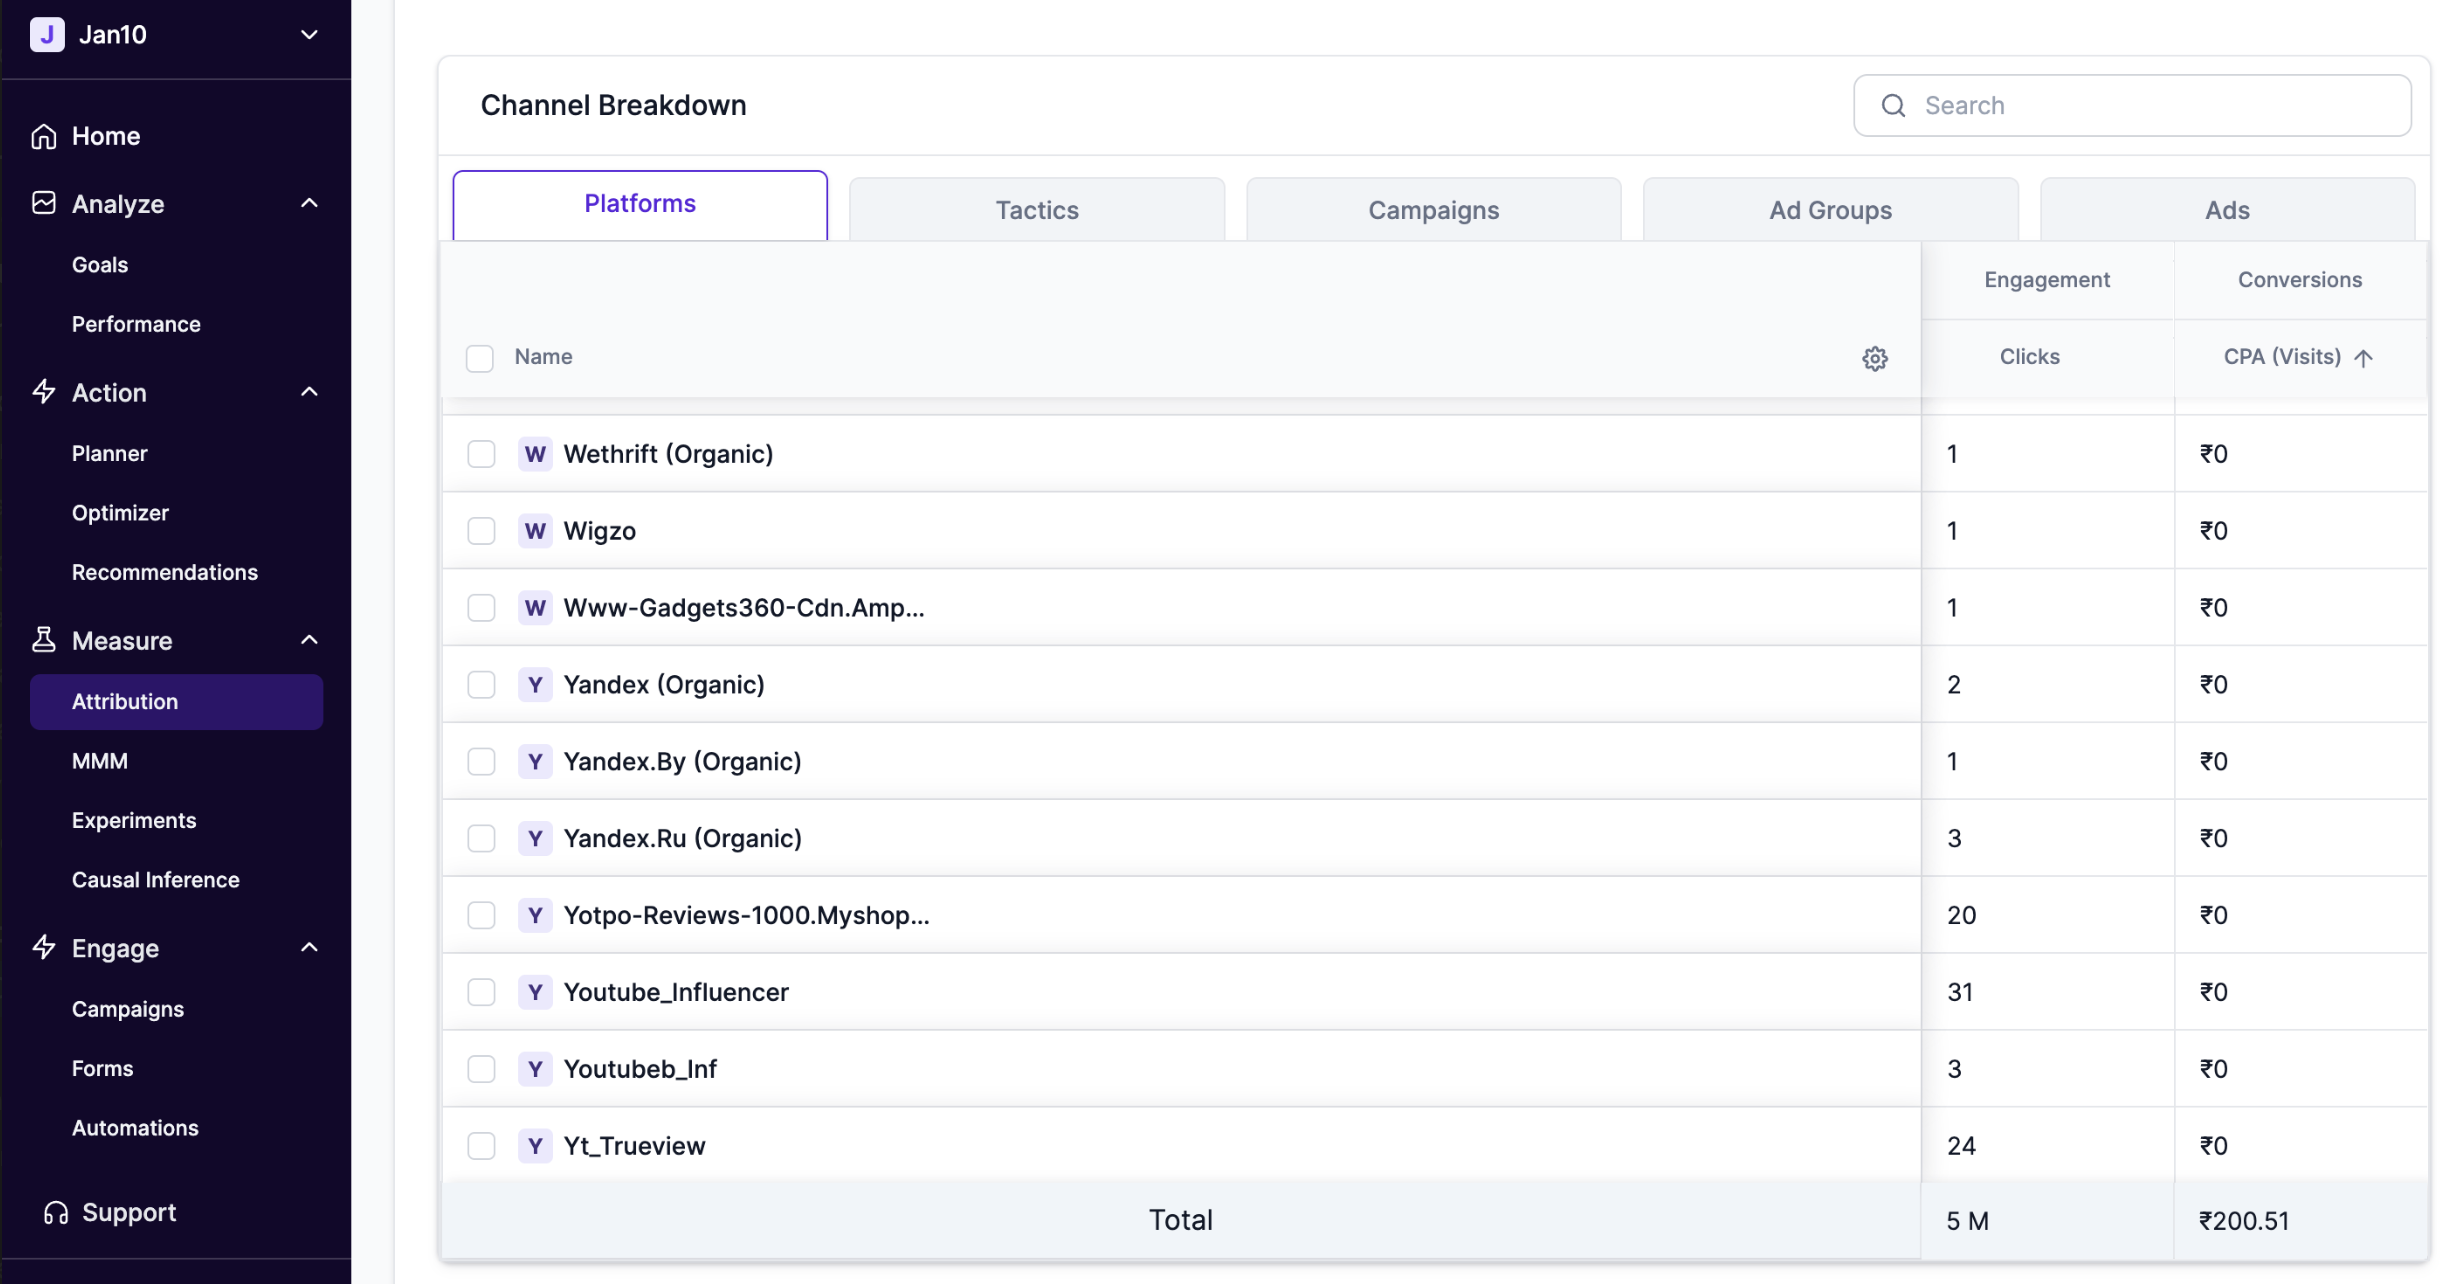
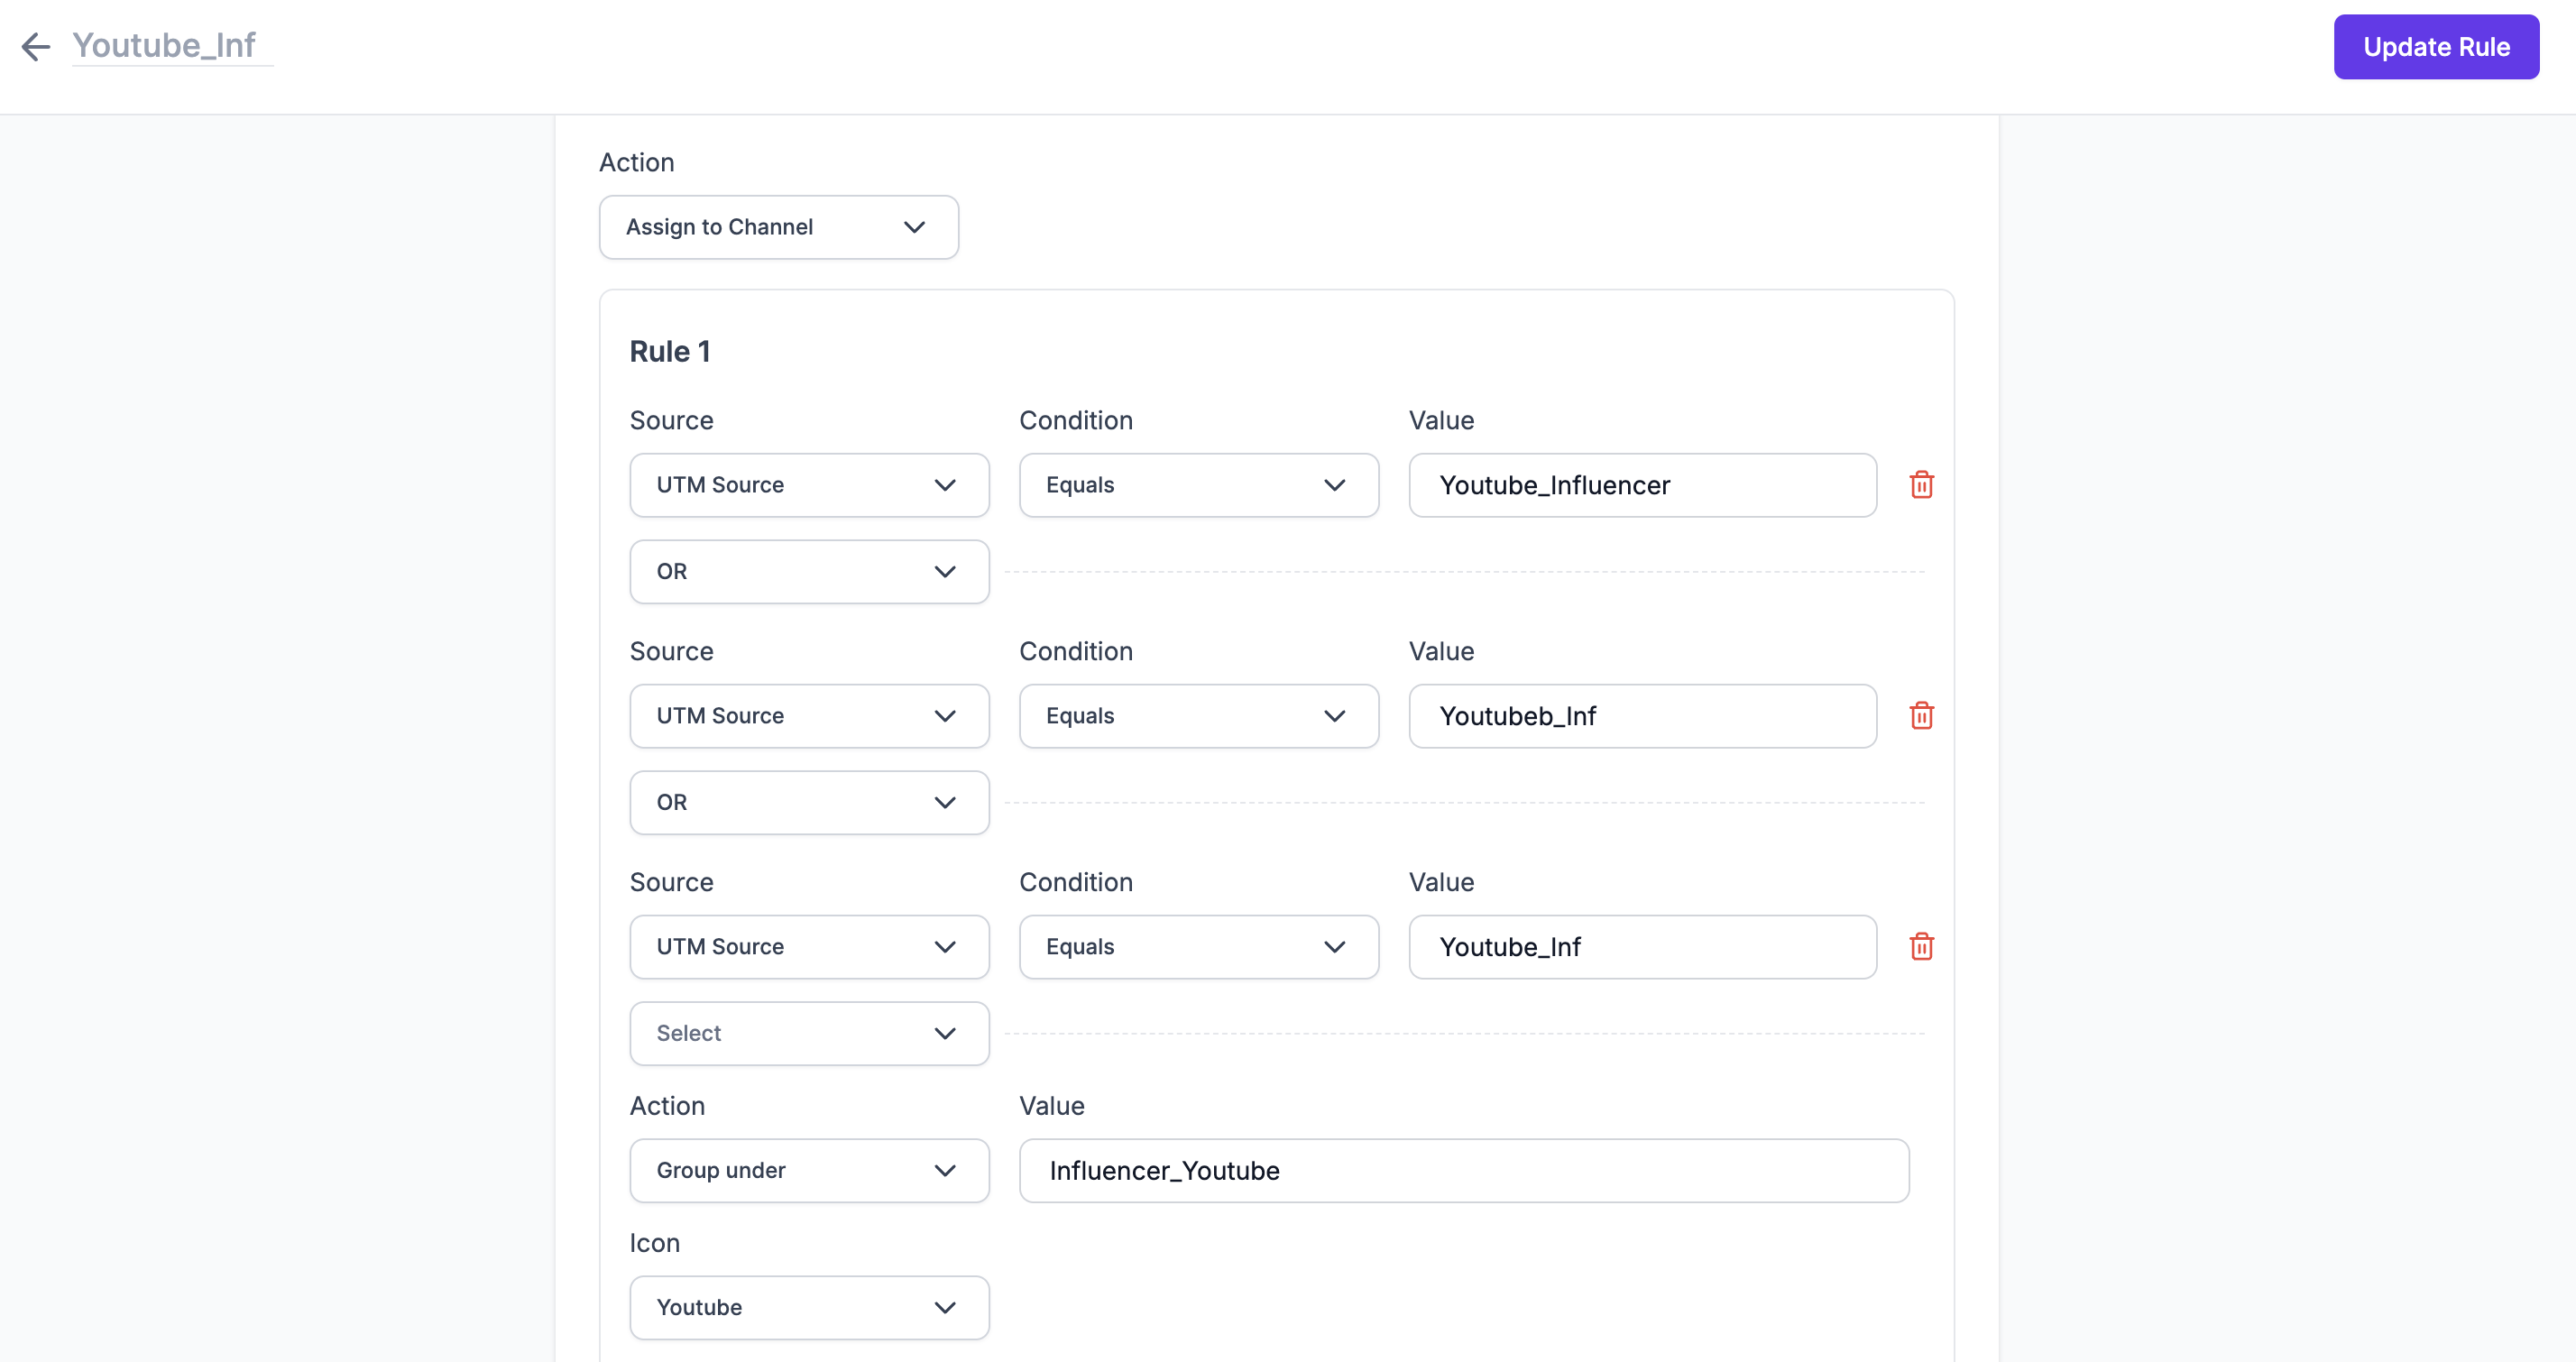
We'll create a Rule to group all of these utm_sources under one label:
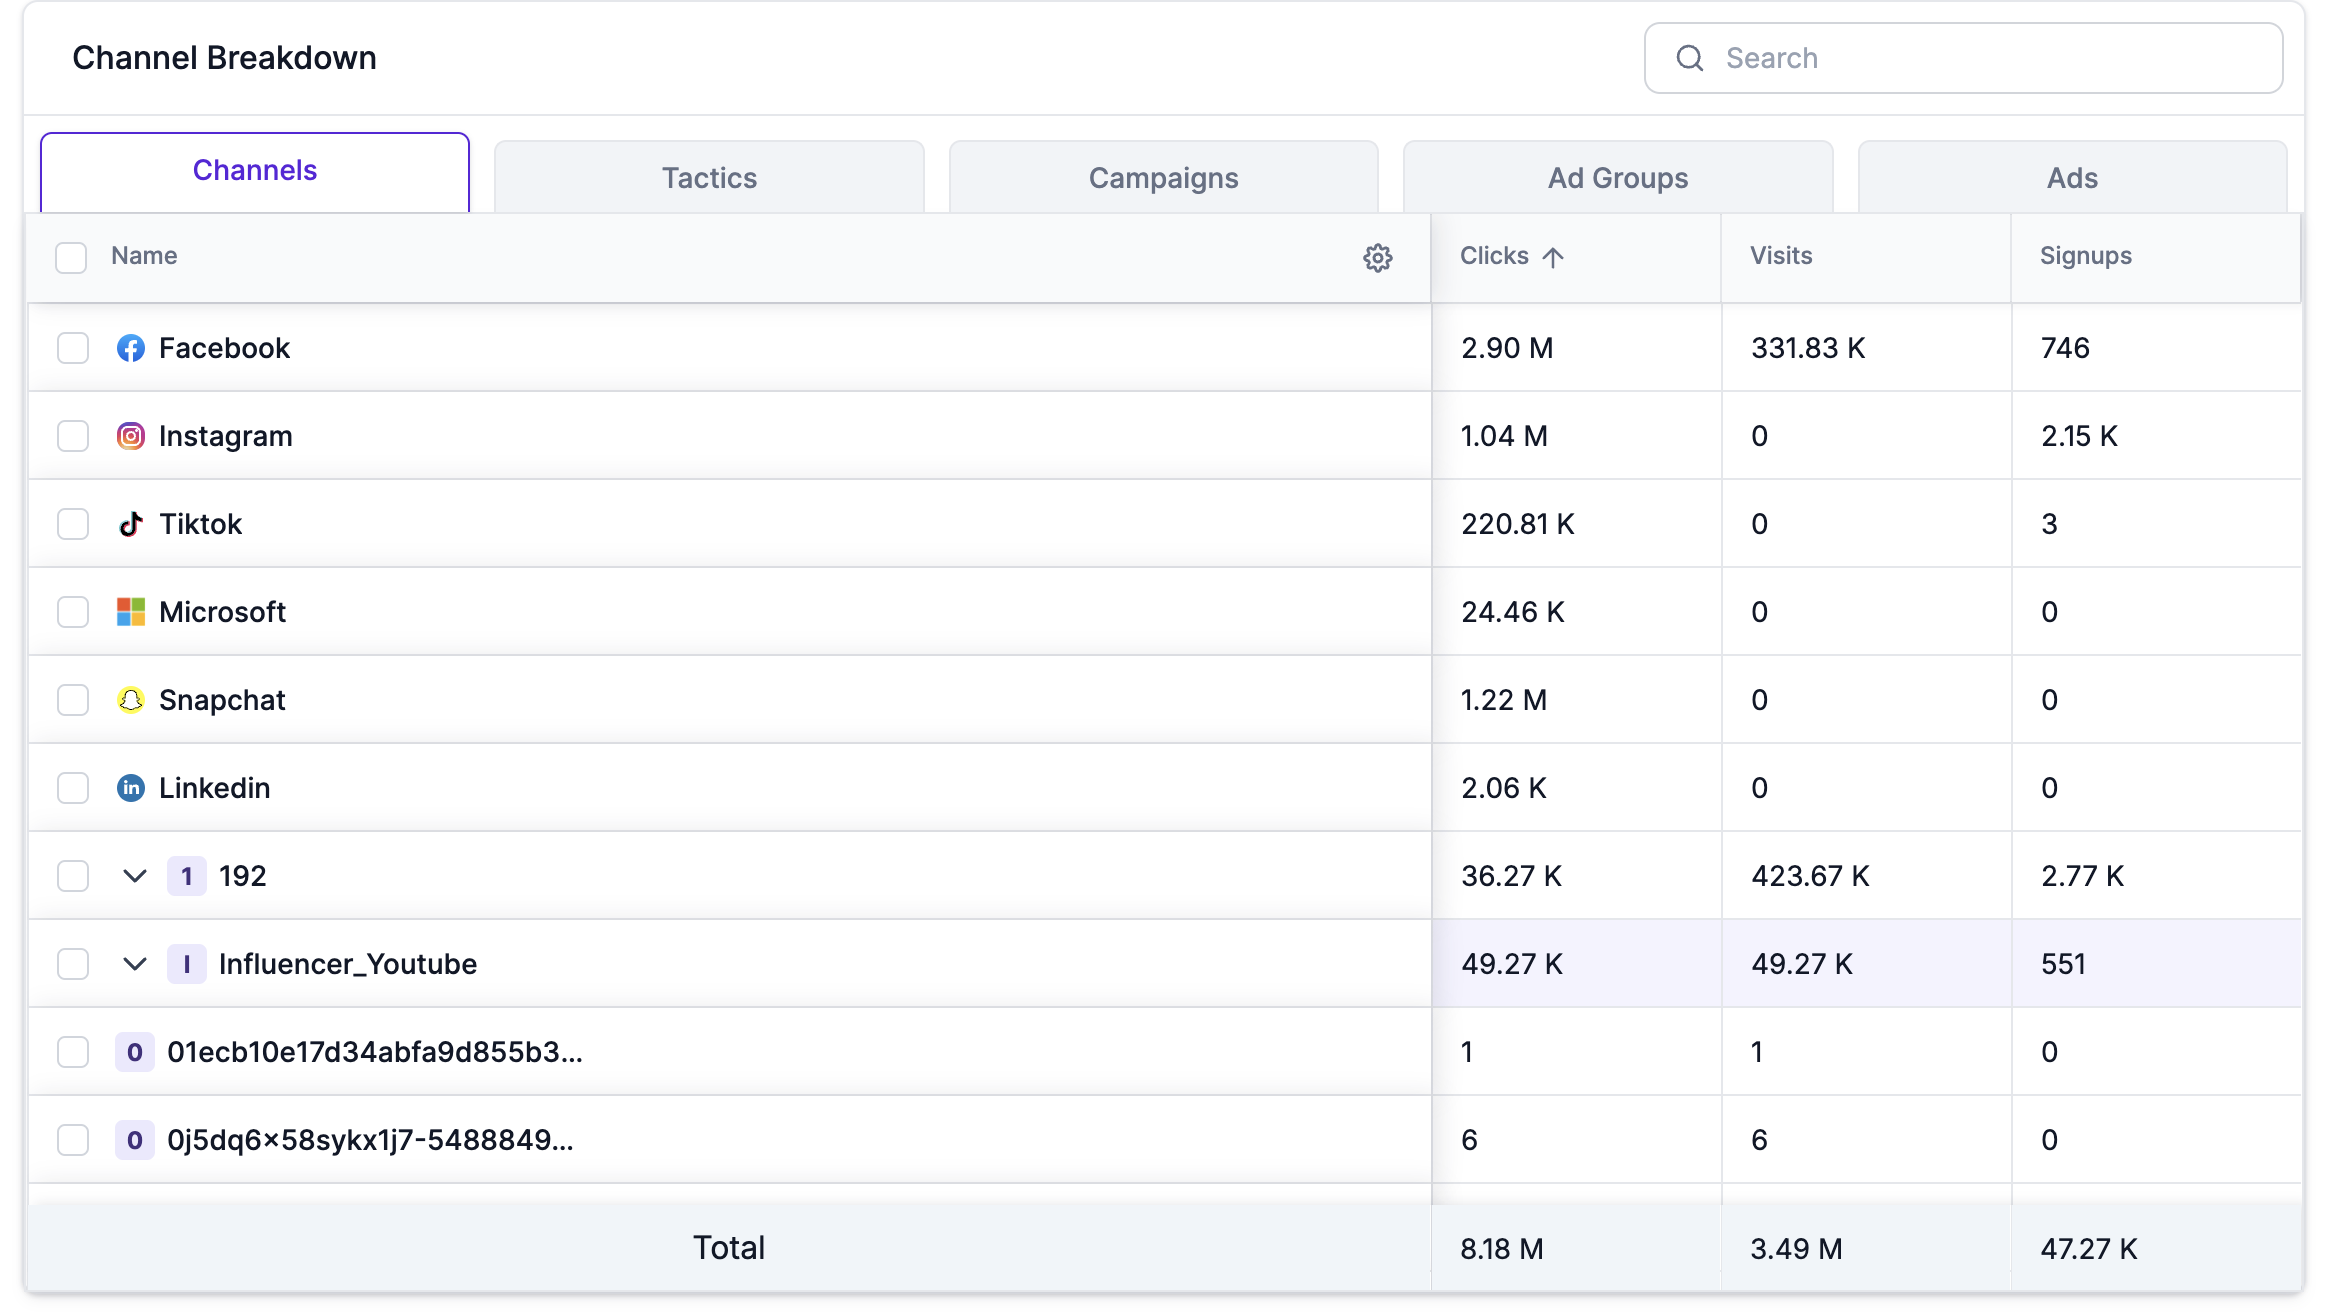
Once the rule is created and active, you can start seeing the aggregated numbers for the label you created in the Attribution Dashboard under Channel breakdown table
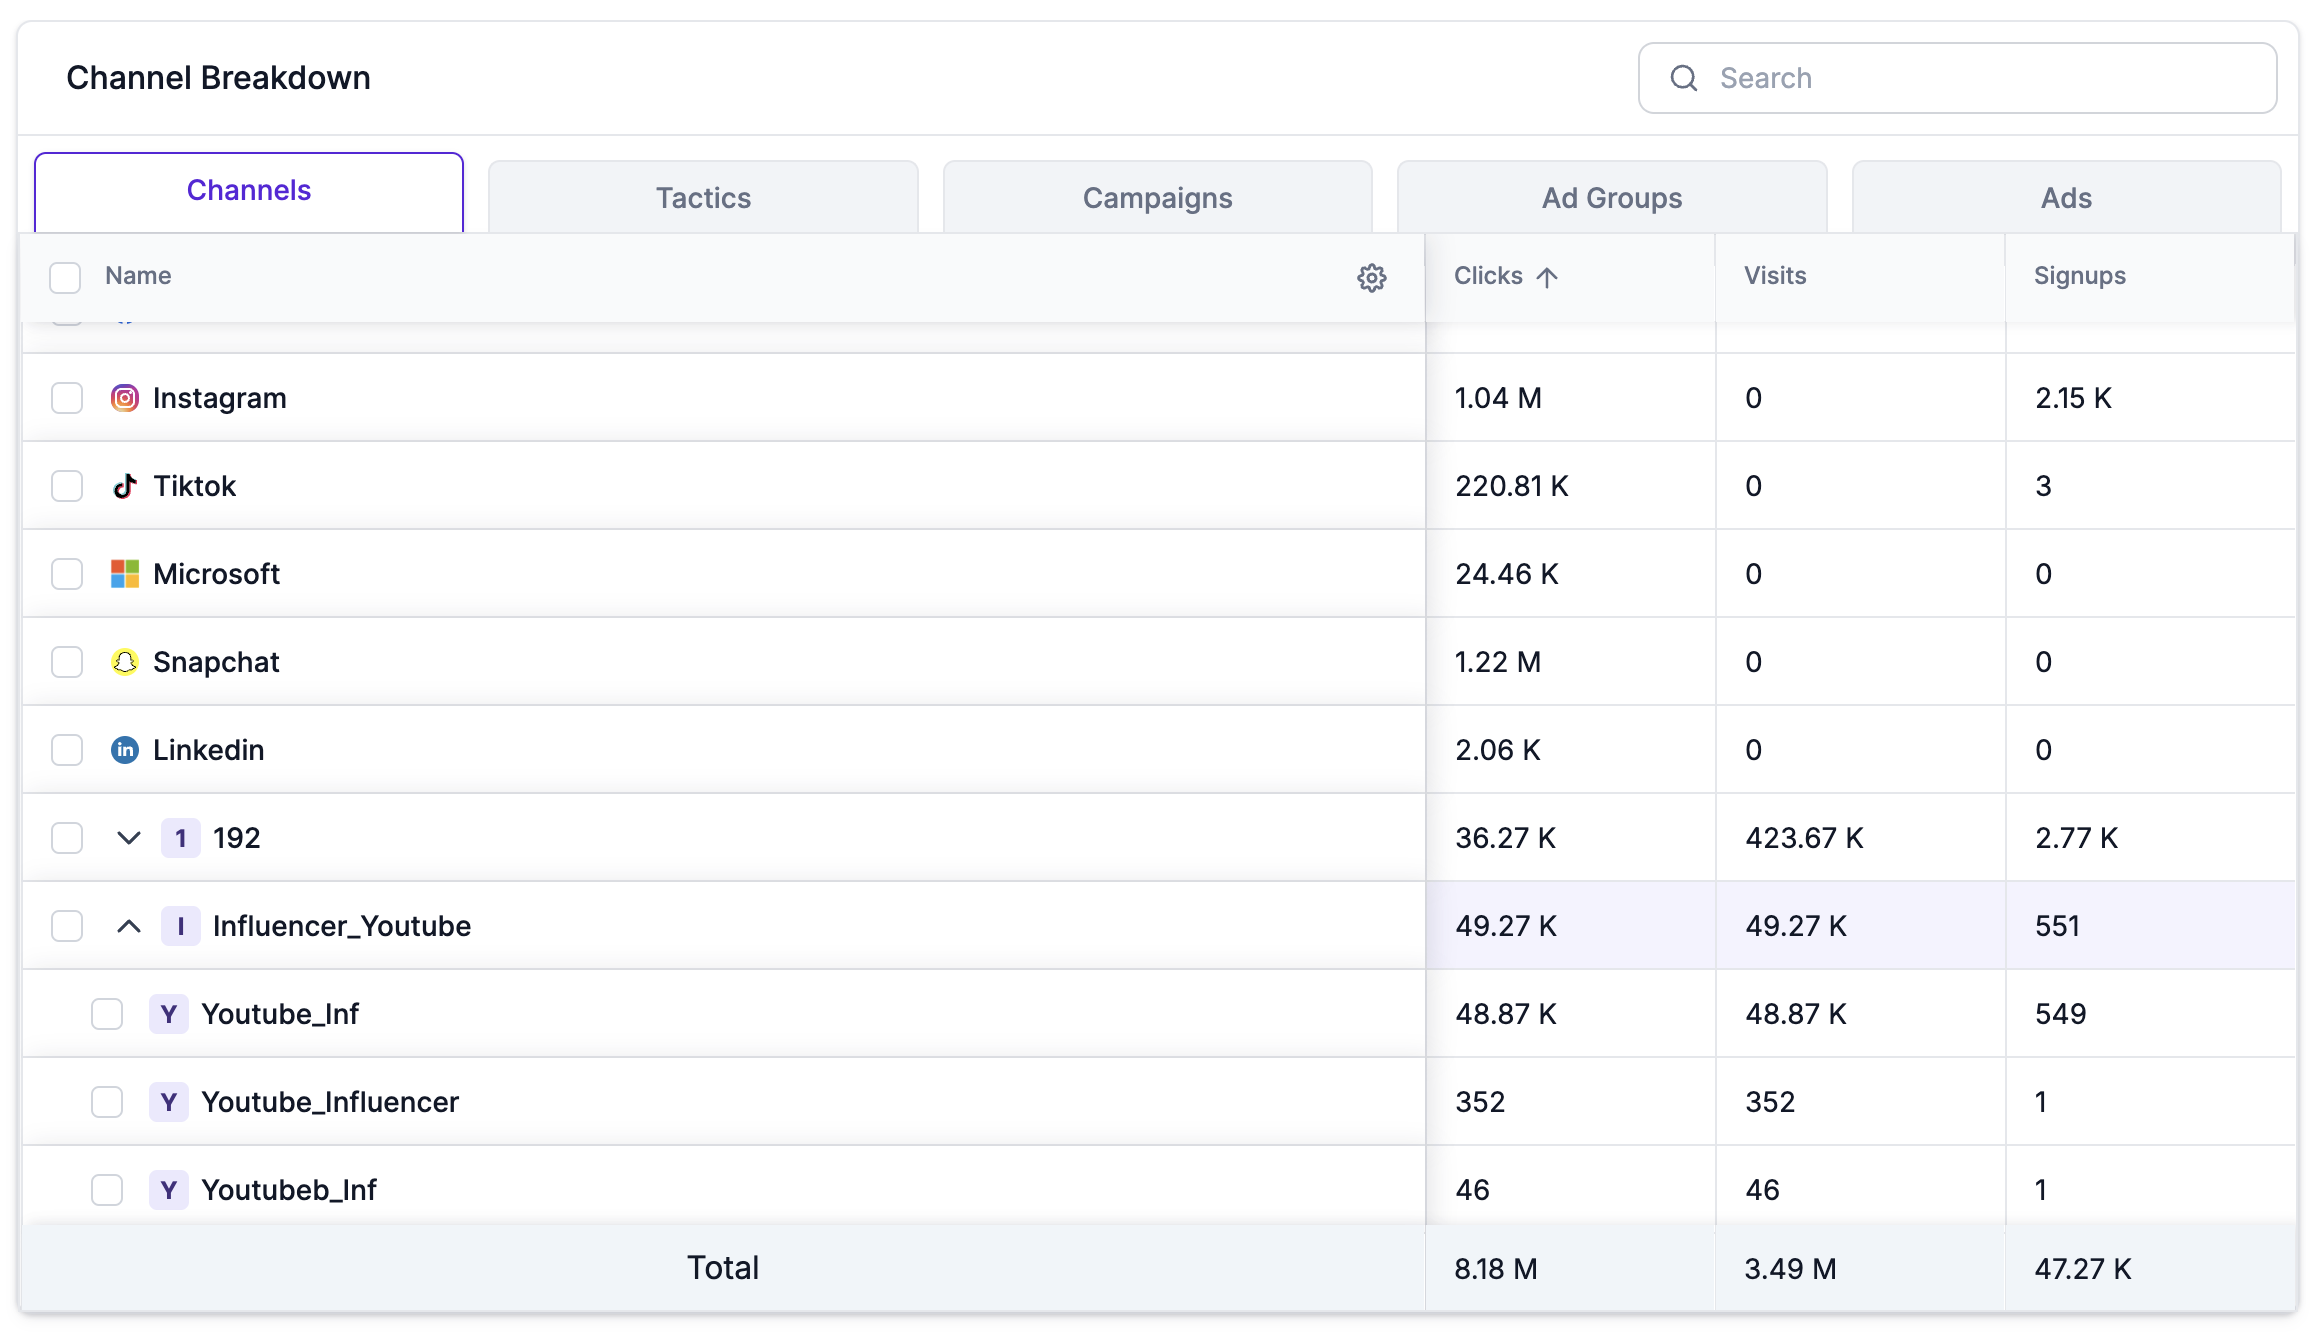
You can also see the breakdown from individual utm_sources under the label by clicking on the down arrow:
Activating and Managing Rules
Once you’ve created your rules, you can manage them under the Settings → Rules & Labels section. Each rule has a toggle switch, allowing you to activate or deactivate it as needed. Additionally, rules can be deleted if no longer needed (except for default rules).
Best Practices for Using Rules & Labels
-
Establish Naming Conventions Early: Set up clear guidelines for UTM parameter usage across your marketing team to avoid discrepancies in the first place. Use Rules & Labels to correct any inconsistencies that slip through.
-
Review and Update Regularly: As your campaigns evolve, your UTM structure may change. Regularly audit your attribution reports and update your rules to ensure they continue to reflect your current marketing efforts.
-
Avoid Overcomplication: While it’s tempting to create multiple complex rules, try to keep things simple. Grouping and labeling should streamline your reporting, not make it more complex.
-
Use Labels for High-Level Analysis: Labels are a great way to simplify reporting at a higher level. For example, you could label all UTM sources related to paid social as “Paid Social” for a more straightforward view of overall social media performance.
Conclusion
Lifesight’s Rules & Labels feature empowers marketers to take control of their UTM data by cleaning up inconsistencies, grouping related channels, and excluding irrelevant data. By following these best practices and setting up the right rules, you can ensure that your attribution data is organized, accurate, and easy to analyze. This will help you gain more precise insights into your marketing performance and optimize your campaigns more effectively.
For more information on how to set up and manage Rules & Labels, or to troubleshoot any issues, feel free to reach out to our support team!
Updated over 1 year ago