Shopify
Learn how to integrate your Shopify store with Lifesight and leverage customer data for better marketing insights.
Shopify is a comprehensive e-commerce platform that provides early-stage entrepreneurs and established businesses with the tools to build, manage, and grow an online retail business. It specializes in simplifying the process of selling goods directly to consumers (D2C) by unifying all aspects of commerce—from website creation to back-office operations—into a single, user-friendly interface.
Use Case: Modeling the Impact of Marketing Spends on your Shopify Revenue
This integration connects your Shopify store data with Lifesight to bring in key commerce metrics such as orders, revenue, discounts, and customer information. These datasets are unified with your marketing spend and performance data from other channels like Meta, Google, and TikTok.
By doing so, you can accurately measure how each marketing channel contributes to driving Shopify revenue. The integration enables advanced Marketing Mix Models (MMM) and attribution analysis within Lifesight, helping you quantify the incremental impact of your marketing investments and optimize future spend for maximum return.
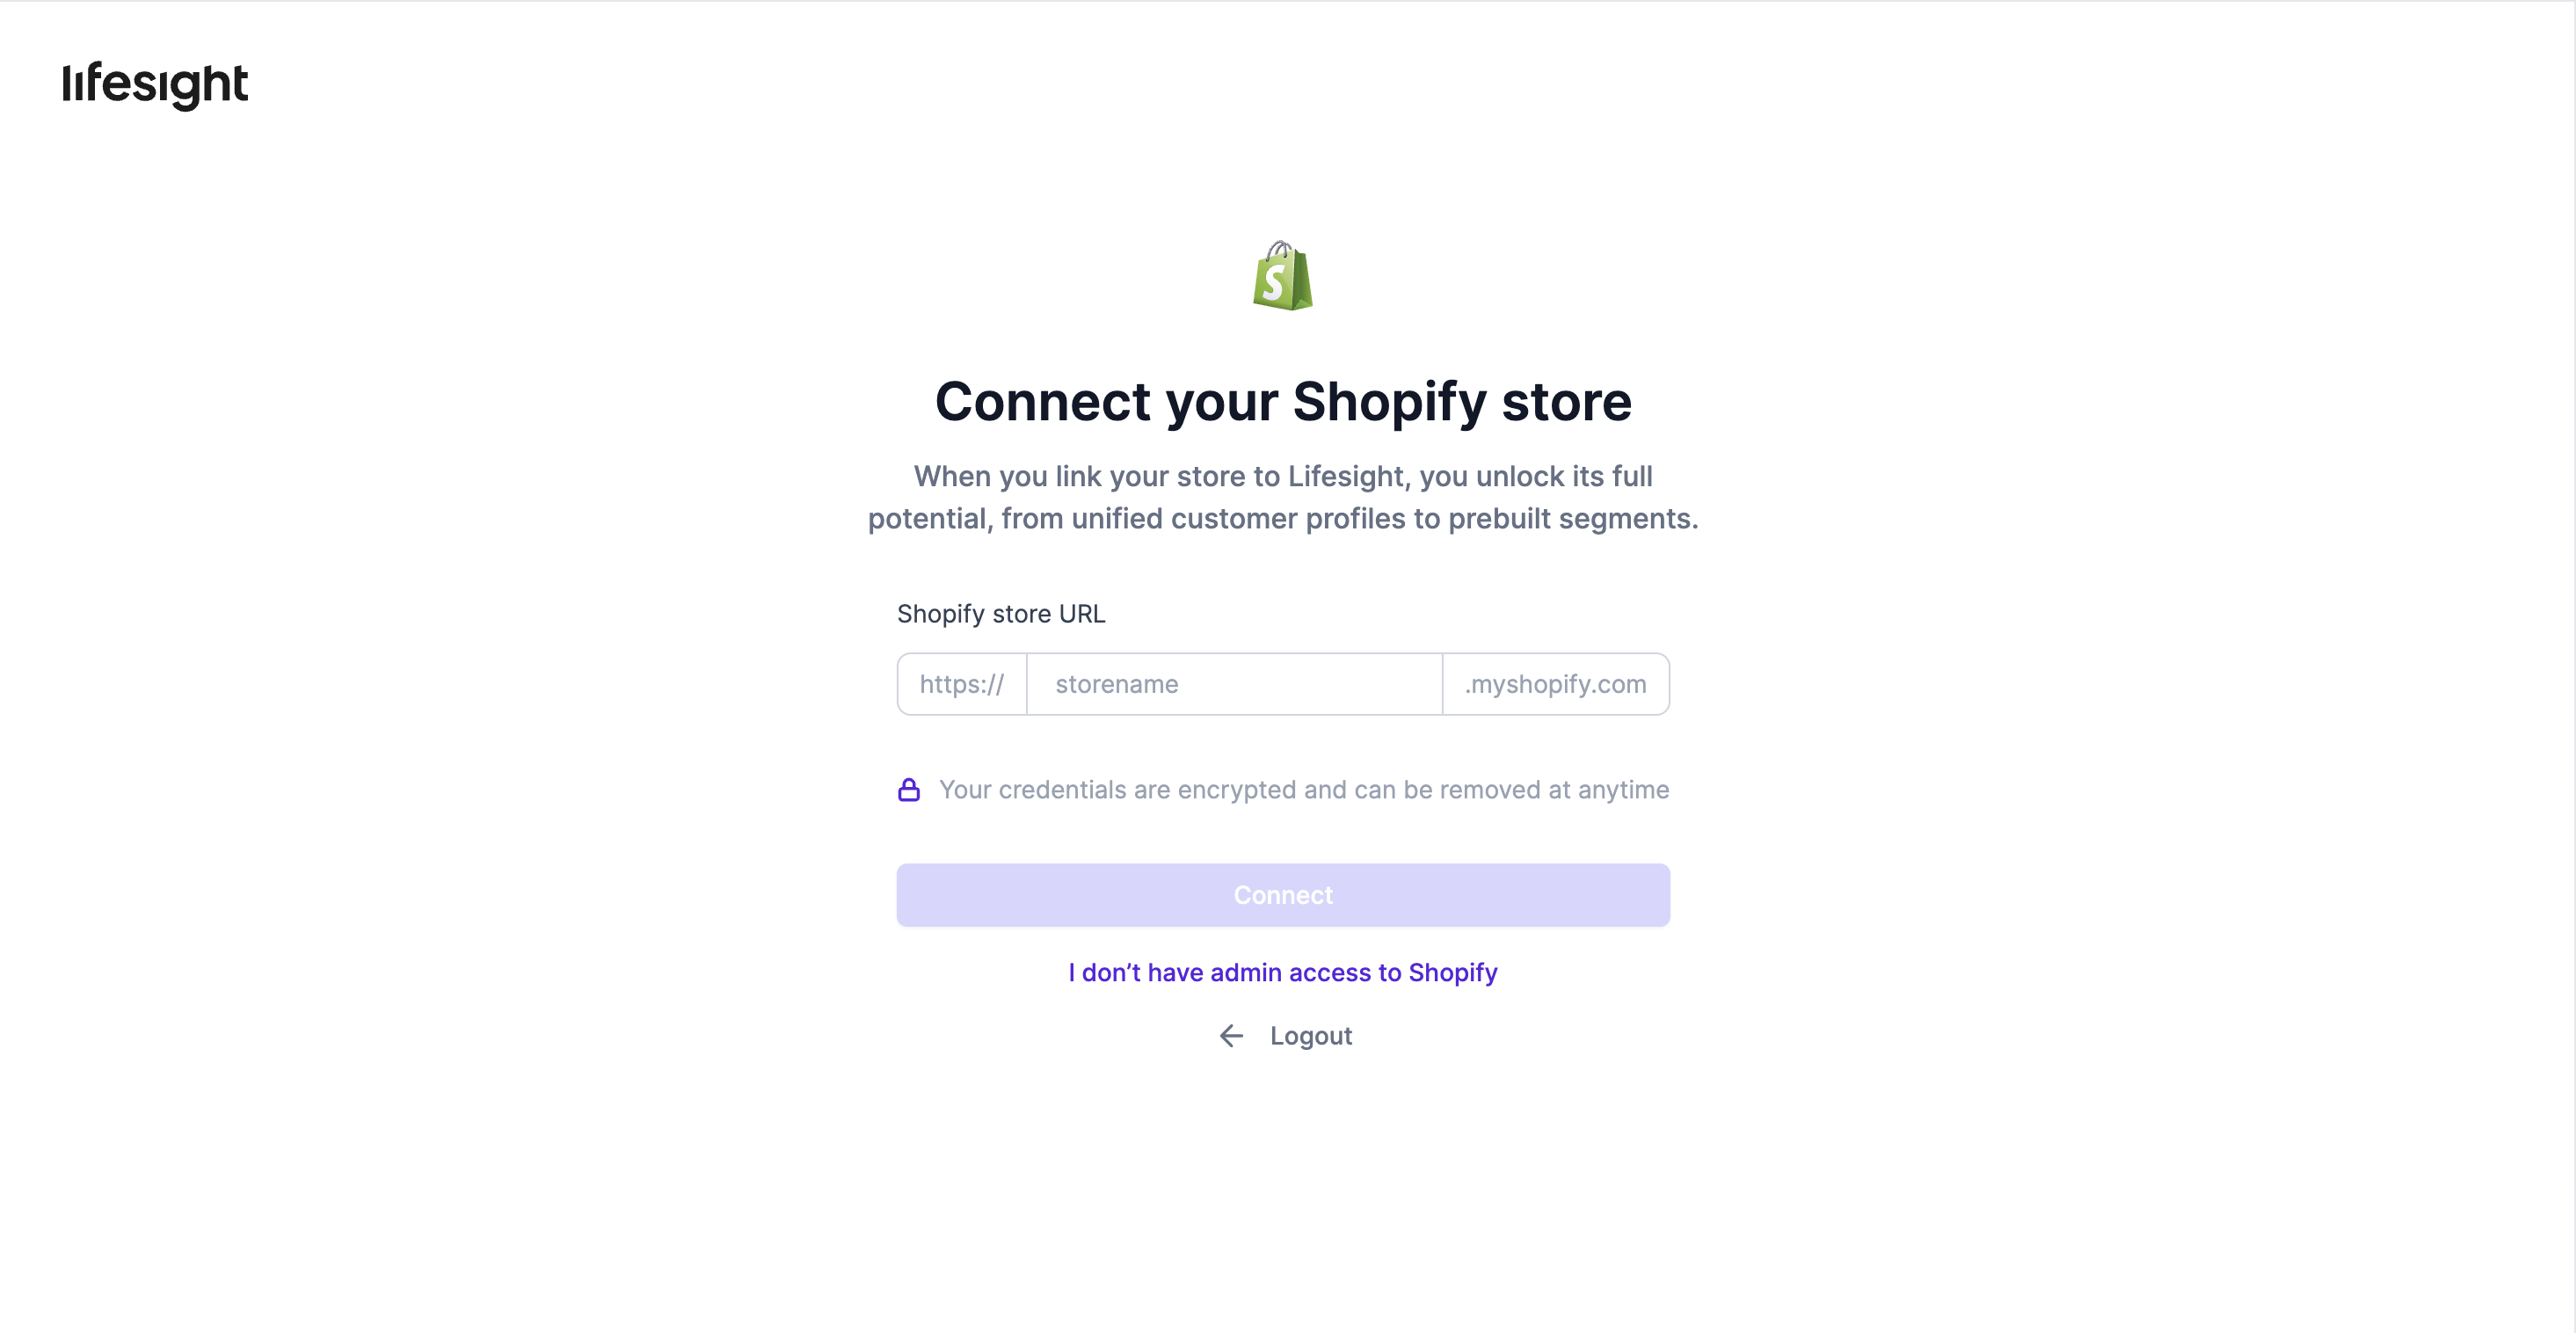
Connect your Shopify Account
To integrate your Shopify data and allow Lifesight to collect data from your store and use it in your marketing activities:
-
Navigate to the Integrations tab in the left-hand menu bar on Lifesight.
-
In the search field, type "Shopify" to locate the integration.
-
Click the Shopify tile and enter your store name (the part before .myshopify.com).
-
Click
Connect -
You’ll be redirected to Shopify and shown the permission screens—review and approve the installation.
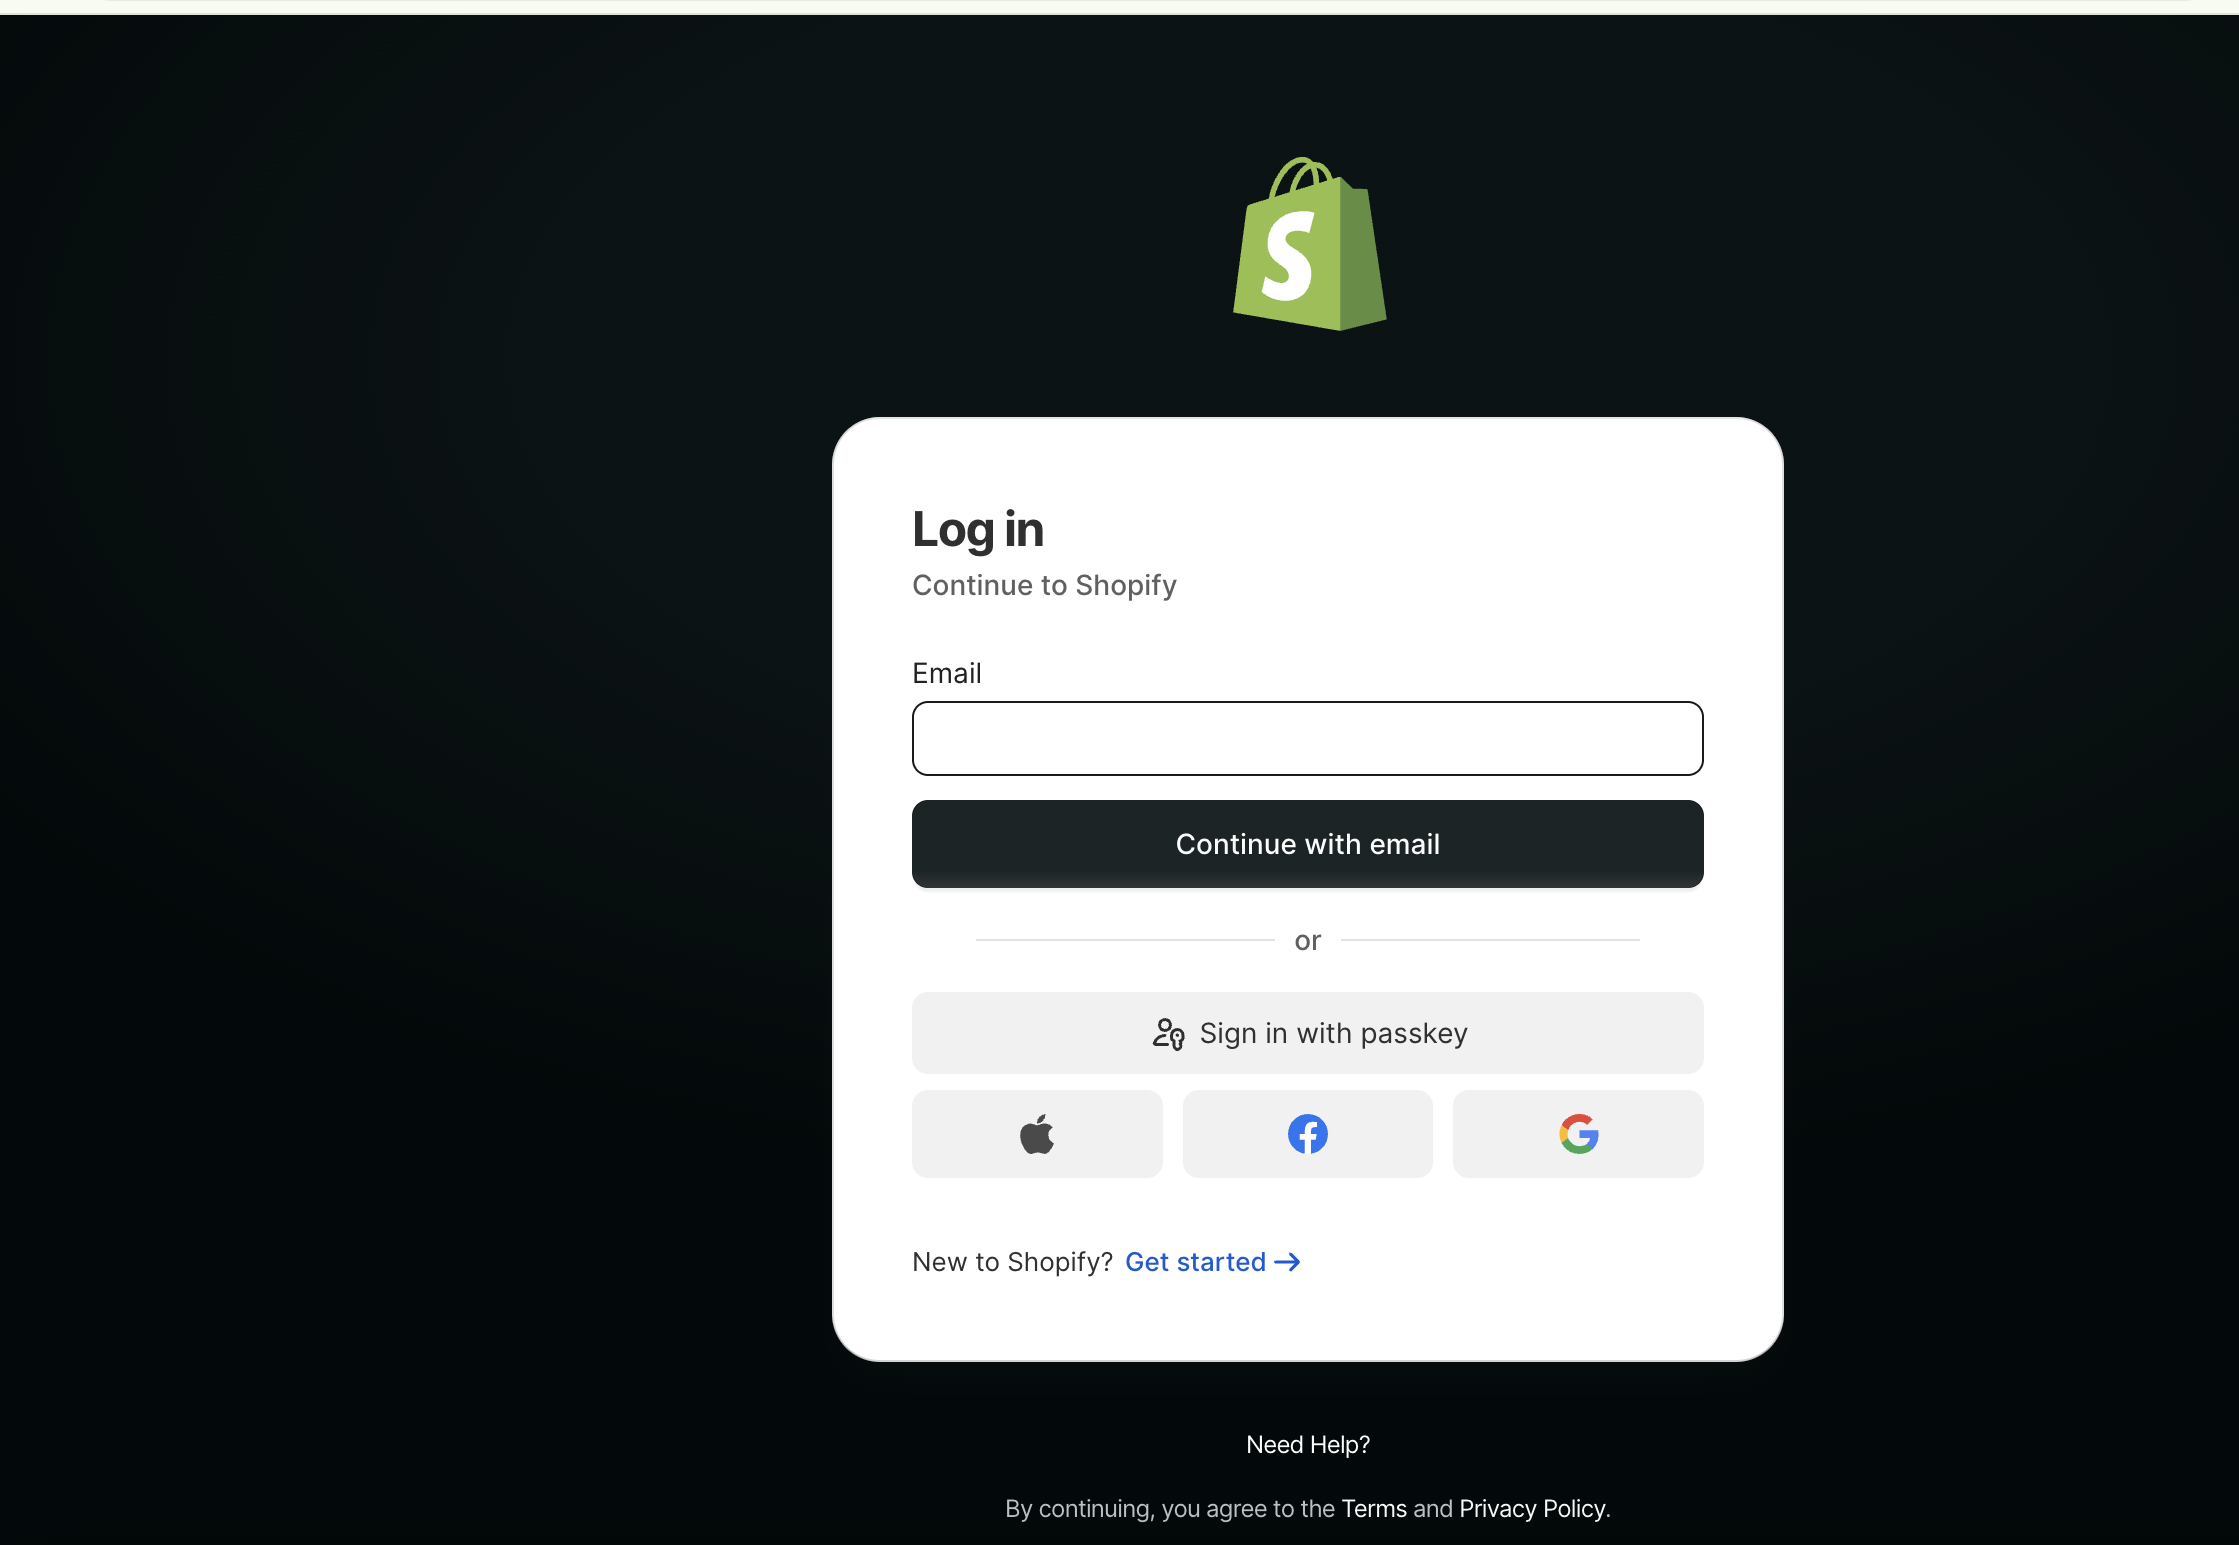
Note: This will not be displayed if you are already logged in to Shopify
-
After installation, you’ll be redirected back to Lifesight.
-
Data will begin appearing in your Dashboards, Profiles, and Segments. Full synchronization can take up to 24 hours.
You are now all set to leverage your store data and measure marketing performance based on customer behavior.
Additional Steps for Enabling Tracking
- Log into your Shopify store and navigate to the "Online Store" section.
- Click on "Customize Theme" to access the theme customization options.
- In the customization menu, select the "App Embeds" section on the left.
- Enable the "Lifesight SDK" and "Lifesight SDK Schema" toggles to activate Lifesight tracking.
- Click "Save" to apply your changes and successfully integrate Lifesight tracking.
Data Collection on Lifesight
App Embeds on the storefront capture basic events—such as product_view , add_to_cart and product_list_view—and issue identify calls to recognize users.
Events captured through Lifesight SDK
page_view- Fires on any page load; captures page URL/title, referrer, UTM params, device, and session info.product_view- When a product detail page is viewed; captures product/variant IDs, handle, price, collection context, and referrer/UTMsproduct_list_view- When a collection/search/listing is viewed; captures list context (collection/search term), product IDs shown, positions, paginationadd_to_cart- When an item is added; captures product/variant IDs, quantity, price/value, currency, and cart tokencart_view- When the cart page/drawer is viewed; captures cart token, line items (IDs, qty, prices), cart value, currencyremove_from_cart- When an item is removed; captures product/variant IDs removed, quantity, cart token, and updated cart valuethank_you_page_view- On order status/thank-you page; captures order ID, line items, and revenue
Events captured through Shopify's Web Pixels
checkout_started— Checkout initiated; captures checkout ID, cart token, line items, subtotal, currency, and customer/contact availability.checkout_shipping_info_submitted— Shipping method step submitted; captures checkout ID, selected shipping rate, shipping address, and updated totals.payment_info_submitted— Payment step submitted; captures checkout ID, payment gateway/type (no card PAN), billing address, and totals.checkout_address_info_submitted— Customer/address step submitted; captures checkout ID, email/phone (often hashed), shipping/billing addresses.checkout_completed— Order completed; captures order ID, checkout ID, line items, total revenue, discounts, taxes, shipping, currency, and customer ID (if logged in).checkout_contact_info_submitted— Contact step submitted; captures checkout ID, customer email/phone (often hashed), marketing opt-in, and session identifiers.
Server Side Events Captured through Shopify
orders_create— Fires when a new order is created; captures order ID, customer (if any), line items, totals, discounts, taxes, shipping, and initial payment/fulfillment state.orders_updated— Fires when an existing order changes; captures the updated fields (e.g., payment status, fulfillment, line items, totals, tags, notes).customers_create— Fires when a new customer record is created; captures customer ID, name, email/phone, addresses, tags, and marketing preferences.customers_updated— Fires when a customer record is modified; captures changed attributes such as contact info, addresses, tags, notes, and marketing opt-in status.
All checkout events are configured through Shopify's Web Pixels. Lifesight doesn't use custom JavaScript for checkout events, and we never inject code directly into checkout pages. Instead, we follow Shopify’s approved approach and use Web Pixels. All checkout events are captured through Shopify Web Pixels.
In case you have any further queries, feel free to write to us at [email protected] and we’ll respond at the earliest.
Updated 5 months ago