Snowflake
Integrate Snowflake to pull in Marketing data from your data warehouse
Snowflake is a fully managed cloud data platform that provides scalable storage, processing, and analysis for both structured and semi-structured data. It is widely used by data teams for its powerful query performance, elasticity, and ability to seamlessly operate across multiple cloud environments.
The Lifesight–Snowflake integration enables you to connect your Snowflake account to the Lifesight platform. Once connected, Lifesight can securely ingest your selected tables or views from Snowflake and unify them with your other marketing and business data sources. This integration allows for comprehensive attribution, analytics, and measurement within the Lifesight ecosystem.
Prerequisites
Before setting up the integration, ensure the following prerequisites are met:
- Snowflake Account Access: You have access to a Snowflake account with permission to create and manage integrations or external connections.
- Warehouse and Database: Ensure that the datasets you want to connect are available in an active Snowflake warehouse and database.
- Read Permissions: The user or service account used for integration should have at least SELECT privileges on the specific tables or views you plan to ingest.
- Network Access: The Snowflake instance should be accessible from external connections. If IP whitelisting is enabled, ensure that Lifesight’s IP addresses are added to the allowed list.
- Credentials: You’ll need your Snowflake account name, warehouse name, database, schema, username, and key-pair authentication details to complete the connection setup.
Steps to Integrate with Snowflake
- In your Snowflake account, Go to
+and click onSQL Worksheet - Once done, paste the following in a New SQL Worksheet
-- ============================================================================
-- LIFESIGHT — SNOWFLAKE INTEGRATION SETUP
-- ============================================================================
-- WHAT THIS DOES
--   Creates a read-only SERVICE account (LIFESIGHT) that Lifesight uses to read
--   the specific tables you choose. Authentication is key-pair only — no
--   password is ever created or stored, so this works under Snowflake's MFA
--   requirement for password logins (SERVICE users are exempt).
--
-- BEFORE YOU RUN
--   1. Replace every <PLACEHOLDER> below with your actual values.
--   2. Run the whole script in a Snowflake worksheet as ACCOUNTADMIN.
--   3. The script is safe to re-run — it never wipes existing grants.
--
-- PLACEHOLDERS TO REPLACE
--   <WAREHOUSE_NAME>   the warehouse Lifesight will use for compute
--                      (must match what you enter in the Lifesight app)
--   <DATABASE_NAME>    the database holding your data
--   <SCHEMA_NAME>      the schema holding your data (repeat blocks for more)
--   <TABLE_NAME>       each table you want Lifesight to read
-- ============================================================================


-- ----------------------------------------------------------------------------
-- STEP 1: Create the Lifesight service user
-- ----------------------------------------------------------------------------
-- Note: CREATE USER IF NOT EXISTS is a silent no-op if the user already exists,
-- so the key and warehouse are applied in Step 2 via ALTER instead. That is what
-- makes this script safely re-runnable.
-- ----------------------------------------------------------------------------
USE ROLE USERADMIN;

CREATE USER IF NOT EXISTS LIFESIGHT
  LOGIN_NAME   = 'LIFESIGHT'
  DISPLAY_NAME = 'Lifesight Integration'
  EMAIL        = '[email protected]'
  COMMENT      = 'Service account for Lifesight Snowflake integration';


-- ----------------------------------------------------------------------------
-- STEP 2: Apply key-pair auth, type, and default warehouse
-- ----------------------------------------------------------------------------
-- These run every time, whether the user is new or pre-existing. If a LIFESIGHT
-- user was created earlier with a password, UNSET PASSWORD must run BEFORE
-- SET TYPE = SERVICE — Snowflake rejects the conversion while a password is
-- still attached. On a fresh account UNSET PASSWORD is a harmless no-op.
-- ----------------------------------------------------------------------------
ALTER USER LIFESIGHT UNSET PASSWORD;

ALTER USER LIFESIGHT SET TYPE = SERVICE;

ALTER USER LIFESIGHT SET
  DEFAULT_WAREHOUSE = <WAREHOUSE_NAME>
  RSA_PUBLIC_KEY    = '<LIFESIGHT_PUBLIC_KEY>';
-- ^ Paste the key exactly as supplied by Lifesight: the base64 body only.
--   Do NOT include the -----BEGIN/END PUBLIC KEY----- lines or any line breaks.
--   A malformed key is the usual cause of "JWT token is invalid" at connect time.


-- ----------------------------------------------------------------------------
-- STEP 3: Create the read-only role and assign it
-- ----------------------------------------------------------------------------
USE ROLE SECURITYADMIN;

CREATE ROLE IF NOT EXISTS LS_ADMIN;
GRANT ROLE LS_ADMIN TO USER LIFESIGHT;
GRANT ROLE LS_ADMIN TO ROLE SYSADMIN;   -- lets your own admins manage it later

-- Make LS_ADMIN the role the service user assumes on connect.
ALTER USER LIFESIGHT SET DEFAULT_ROLE = LS_ADMIN;


-- ----------------------------------------------------------------------------
-- STEP 4: Grant warehouse access
-- ----------------------------------------------------------------------------
-- Must be the same warehouse configured in the Lifesight app.
-- ----------------------------------------------------------------------------
GRANT USAGE ON WAREHOUSE <WAREHOUSE_NAME> TO ROLE LS_ADMIN;


-- ----------------------------------------------------------------------------
-- STEP 5: Grant database and schema visibility
-- ----------------------------------------------------------------------------
-- USAGE only lets the role *see* the container — it grants no data access.
-- Repeat the SCHEMA line for each additional schema.
-- ----------------------------------------------------------------------------
GRANT USAGE ON DATABASE <DATABASE_NAME>                TO ROLE LS_ADMIN;
GRANT USAGE ON SCHEMA   <DATABASE_NAME>.<SCHEMA_NAME>  TO ROLE LS_ADMIN;


-- ----------------------------------------------------------------------------
-- STEP 6: Grant read access to your data
-- ----------------------------------------------------------------------------
-- OPTION A (recommended) — explicit, one line per object. Lifesight can read
-- only what is listed here and nothing else.
-- ----------------------------------------------------------------------------
GRANT SELECT ON TABLE <DATABASE_NAME>.<SCHEMA_NAME>.<TABLE_NAME> TO ROLE LS_ADMIN;
-- GRANT SELECT ON TABLE <DATABASE_NAME>.<SCHEMA_NAME>.<TABLE_NAME_2> TO ROLE LS_ADMIN;
-- GRANT SELECT ON VIEW  <DATABASE_NAME>.<SCHEMA_NAME>.<VIEW_NAME>    TO ROLE LS_ADMIN;

-- ----------------------------------------------------------------------------
-- OPTION B (broader) — grant every current and future table/view in the schema.
-- Convenient if new objects appear regularly. Uncomment to use INSTEAD of
-- Option A. FUTURE grants apply automatically to objects created later.
-- ----------------------------------------------------------------------------
-- GRANT SELECT ON ALL    TABLES IN SCHEMA <DATABASE_NAME>.<SCHEMA_NAME> TO ROLE LS_ADMIN;
-- GRANT SELECT ON FUTURE TABLES IN SCHEMA <DATABASE_NAME>.<SCHEMA_NAME> TO ROLE LS_ADMIN;
-- GRANT SELECT ON ALL    VIEWS  IN SCHEMA <DATABASE_NAME>.<SCHEMA_NAME> TO ROLE LS_ADMIN;
-- GRANT SELECT ON FUTURE VIEWS  IN SCHEMA <DATABASE_NAME>.<SCHEMA_NAME> TO ROLE LS_ADMIN;


-- ----------------------------------------------------------------------------
-- STEP 7: Verify before returning to the Lifesight app
-- ----------------------------------------------------------------------------
DESC USER LIFESIGHT;
--   Expect: TYPE = SERVICE
--           RSA_PUBLIC_KEY_FP is populated (not null)
--           DEFAULT_WAREHOUSE and DEFAULT_ROLE are set
--           HAS_PASSWORD = false

SHOW GRANTS TO ROLE LS_ADMIN;
--   Expect: USAGE on the warehouse, database, and schema(s)
--           SELECT on each table/view you granted


-- ============================================================================
-- TROUBLESHOOTING
--   "JWT token is invalid"      → key not applied, or PEM header/footer or line
--                                 breaks were included. Re-run Step 2 and check
--                                 RSA_PUBLIC_KEY_FP in DESC USER.
--   "Object does not exist"     → missing USAGE on the database or schema, or a
--                                 typo in the fully-qualified name (Step 5/6).
--   "No active warehouse"       → warehouse in Step 2/4 differs from the one
--                                 entered in the Lifesight app.
--   Password conversion error   → run STEP 2's UNSET PASSWORD before SET TYPE.
-- ============================================================================- Execute all the commands in the above worksheet
- Please make sure to obtain the Public Key from your Account Manager/Support representative and paste them in the above worksheet correctly.
- To finish the integration process, click on the Snowflake tile in the Integrations tab
- Navigate to the Data tab in the left-hand menu bar.
- In the search field, type in "Snowflake" to locate the integration for this application.
- Provide Lifesight with the following information to complete the integration:
- Account Identifier
- To retrieve your account identifier, log in to your Snowflake account and check the URL. The account identifier is the part before '.snowflakecomputing.com'. For example: in 'myorg-account123.snowflakecomputing.com', the account identifier is 'myorg-account123'.
- Database Name
- The name of the database you would like to provide Lifesight access to
- Schema Name
- Schema name only, without the database. Example: ANALYTICS, not PROD_DB.ANALYTICS.
- Table Name
- Enter as schema.table. Example: ANALYTICS.ORDERS. Don't include the database name.
- Account Identifier
- Click on "Done"
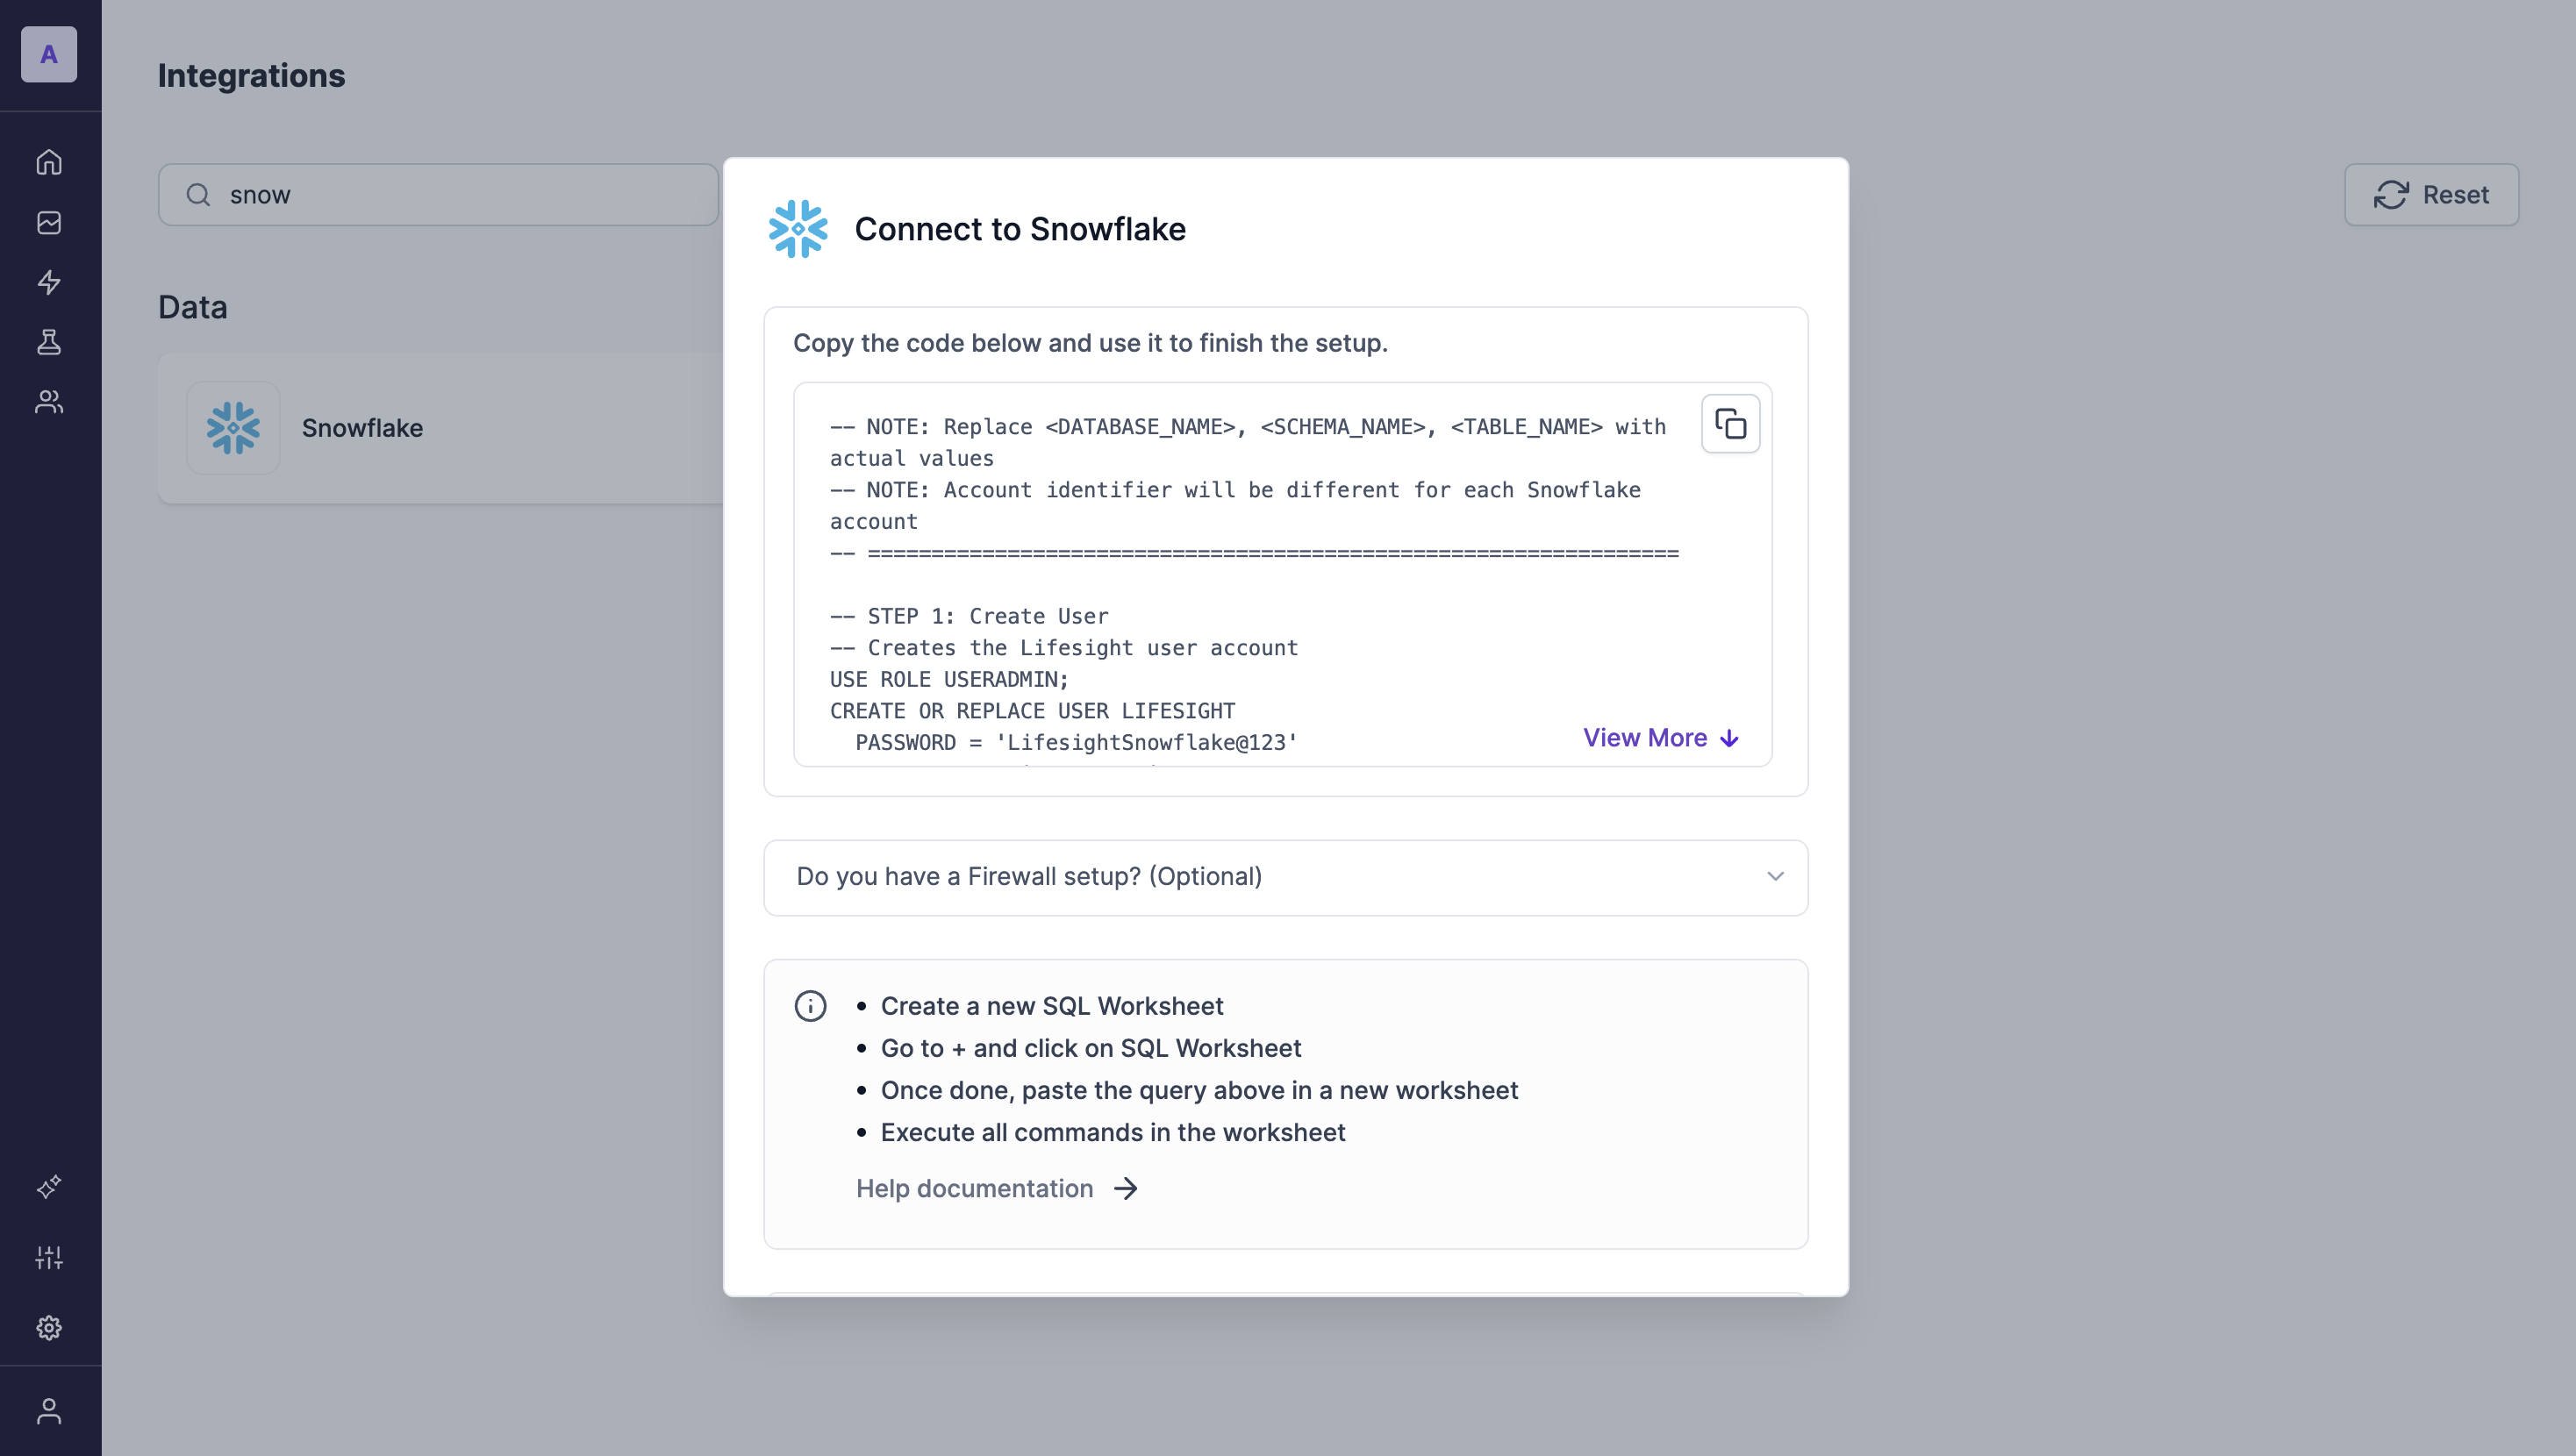
If you have a Firewall setup for Snowflake, please make sure you create a Network Policy for Snowflake
Step 1: Create a network policy for your external system user
CREATE NETWORK POLICY LIFESIGHT_NETWORK_POLICY
ALLOWED_IP_LIST = ('35.206.86.230')
COMMENT = 'Restrict Lifesight to specific IP only';Step 2: Apply this policy ONLY to your new user
ALTER USER LIFESIGHT
SET NETWORK_POLICY = 'LIFESIGHT_NETWORK_POLICY';
Updated 7 days ago