Building a media plan
Step-by-step guide to create a media plan
The Planner allows you to simulate and forecast the potential impact of different marketing budget allocations. By creating various scenarios based on your existing Marketing Mix Models, you can make informed, data-driven decisions to optimize spend and maximize revenue.
Use the interactive demo below to guide you through each step of the plan creation process
Step 1: Create a New Plan
To create a new budget plan, start from the main Planner page and click the Create Plan button to begin the scenario configuration process.
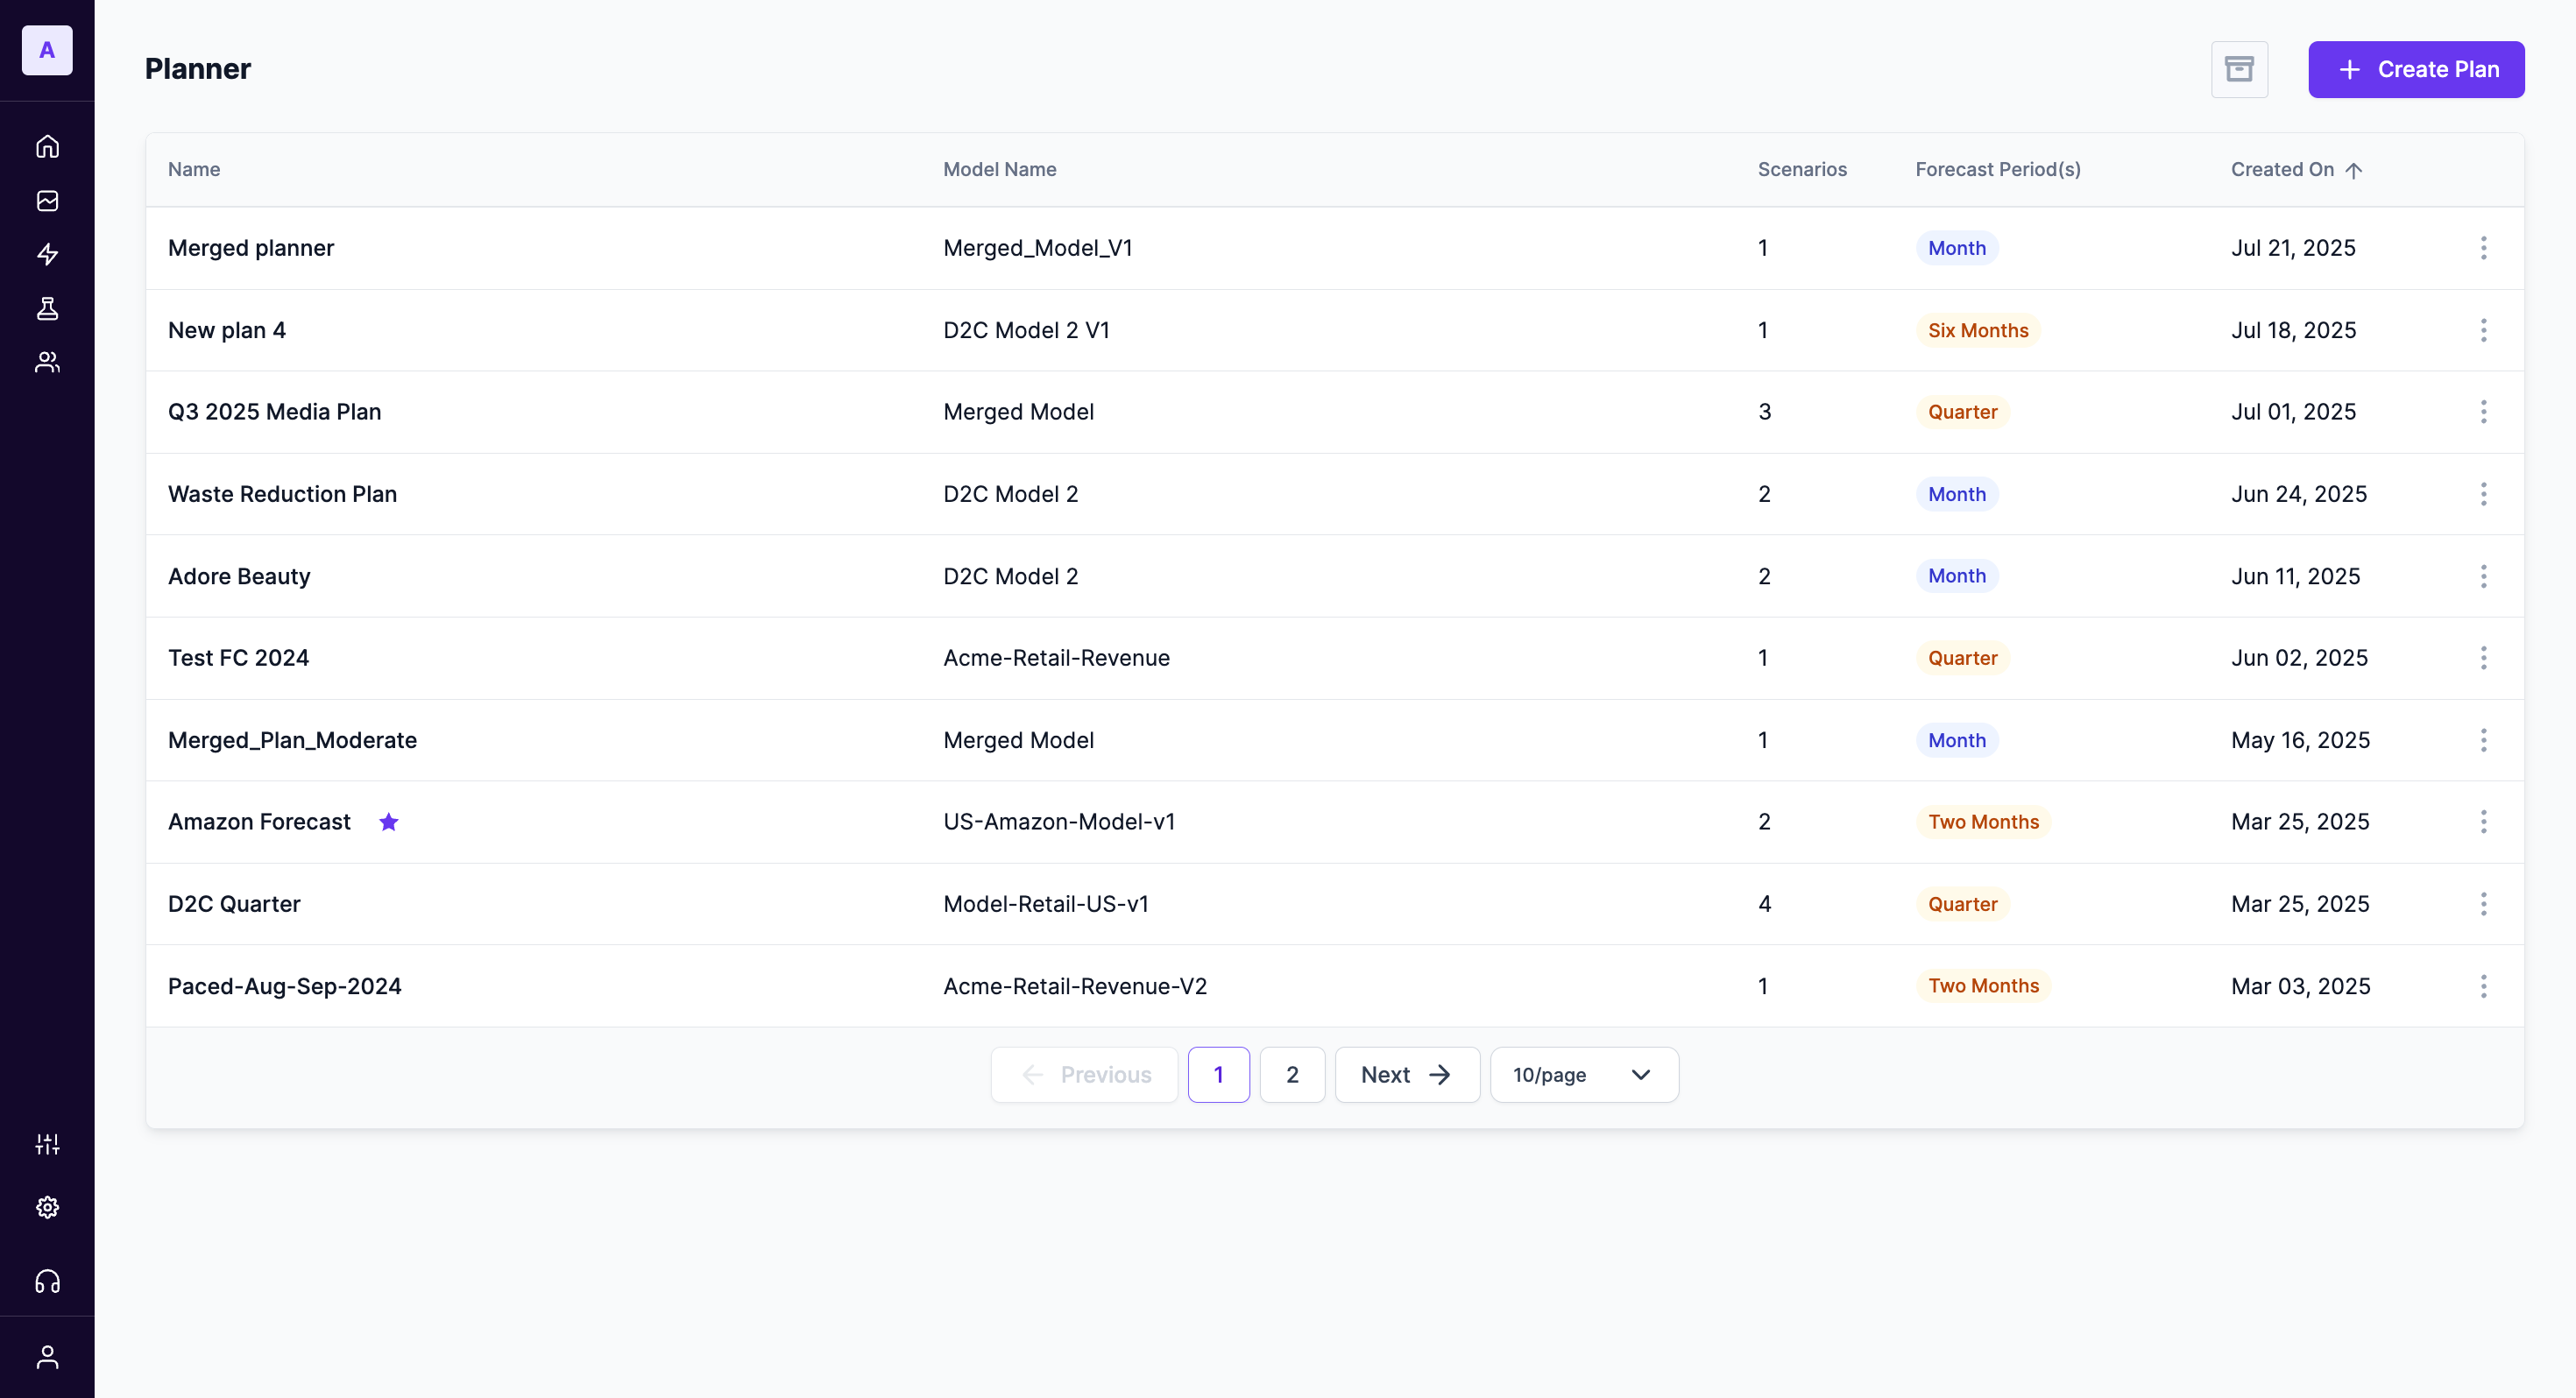
You can also create a plan directly from a specific Marketing Mix Model. Navigate to the Marketing Mix Models page, select a model, and click the Create Plan button on the top-right.
Step 2: Configure the Scenario
After starting a new plan, you will be taken to the scenario configuration page. Here, you will define the parameters for your budget simulation.
Selecting the Base Model
From the Select Model dropdown, choose the successfully calibrated Marketing Mix Model you wish to use as the foundation for your plan.
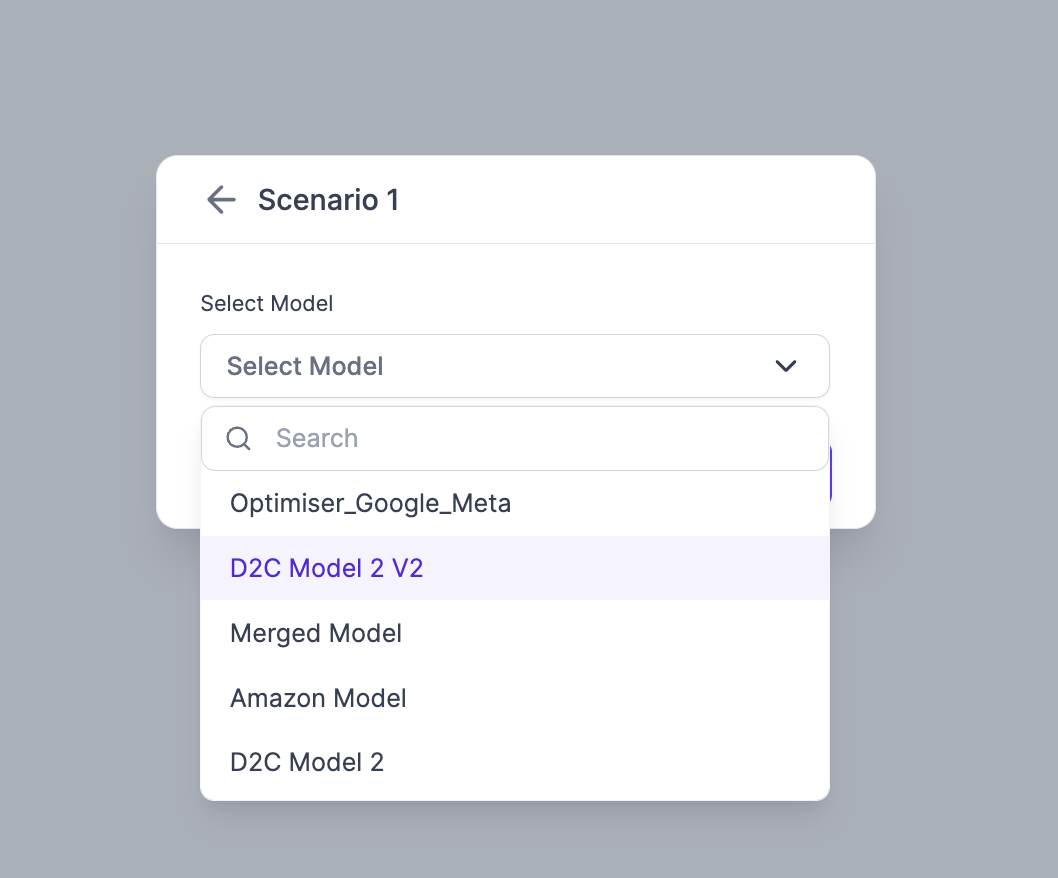
To get precise predictions and budget allocation recommendations, ensure the model you select has been fed the latest data.
Setting the Goal, Forecast, and Basis Period
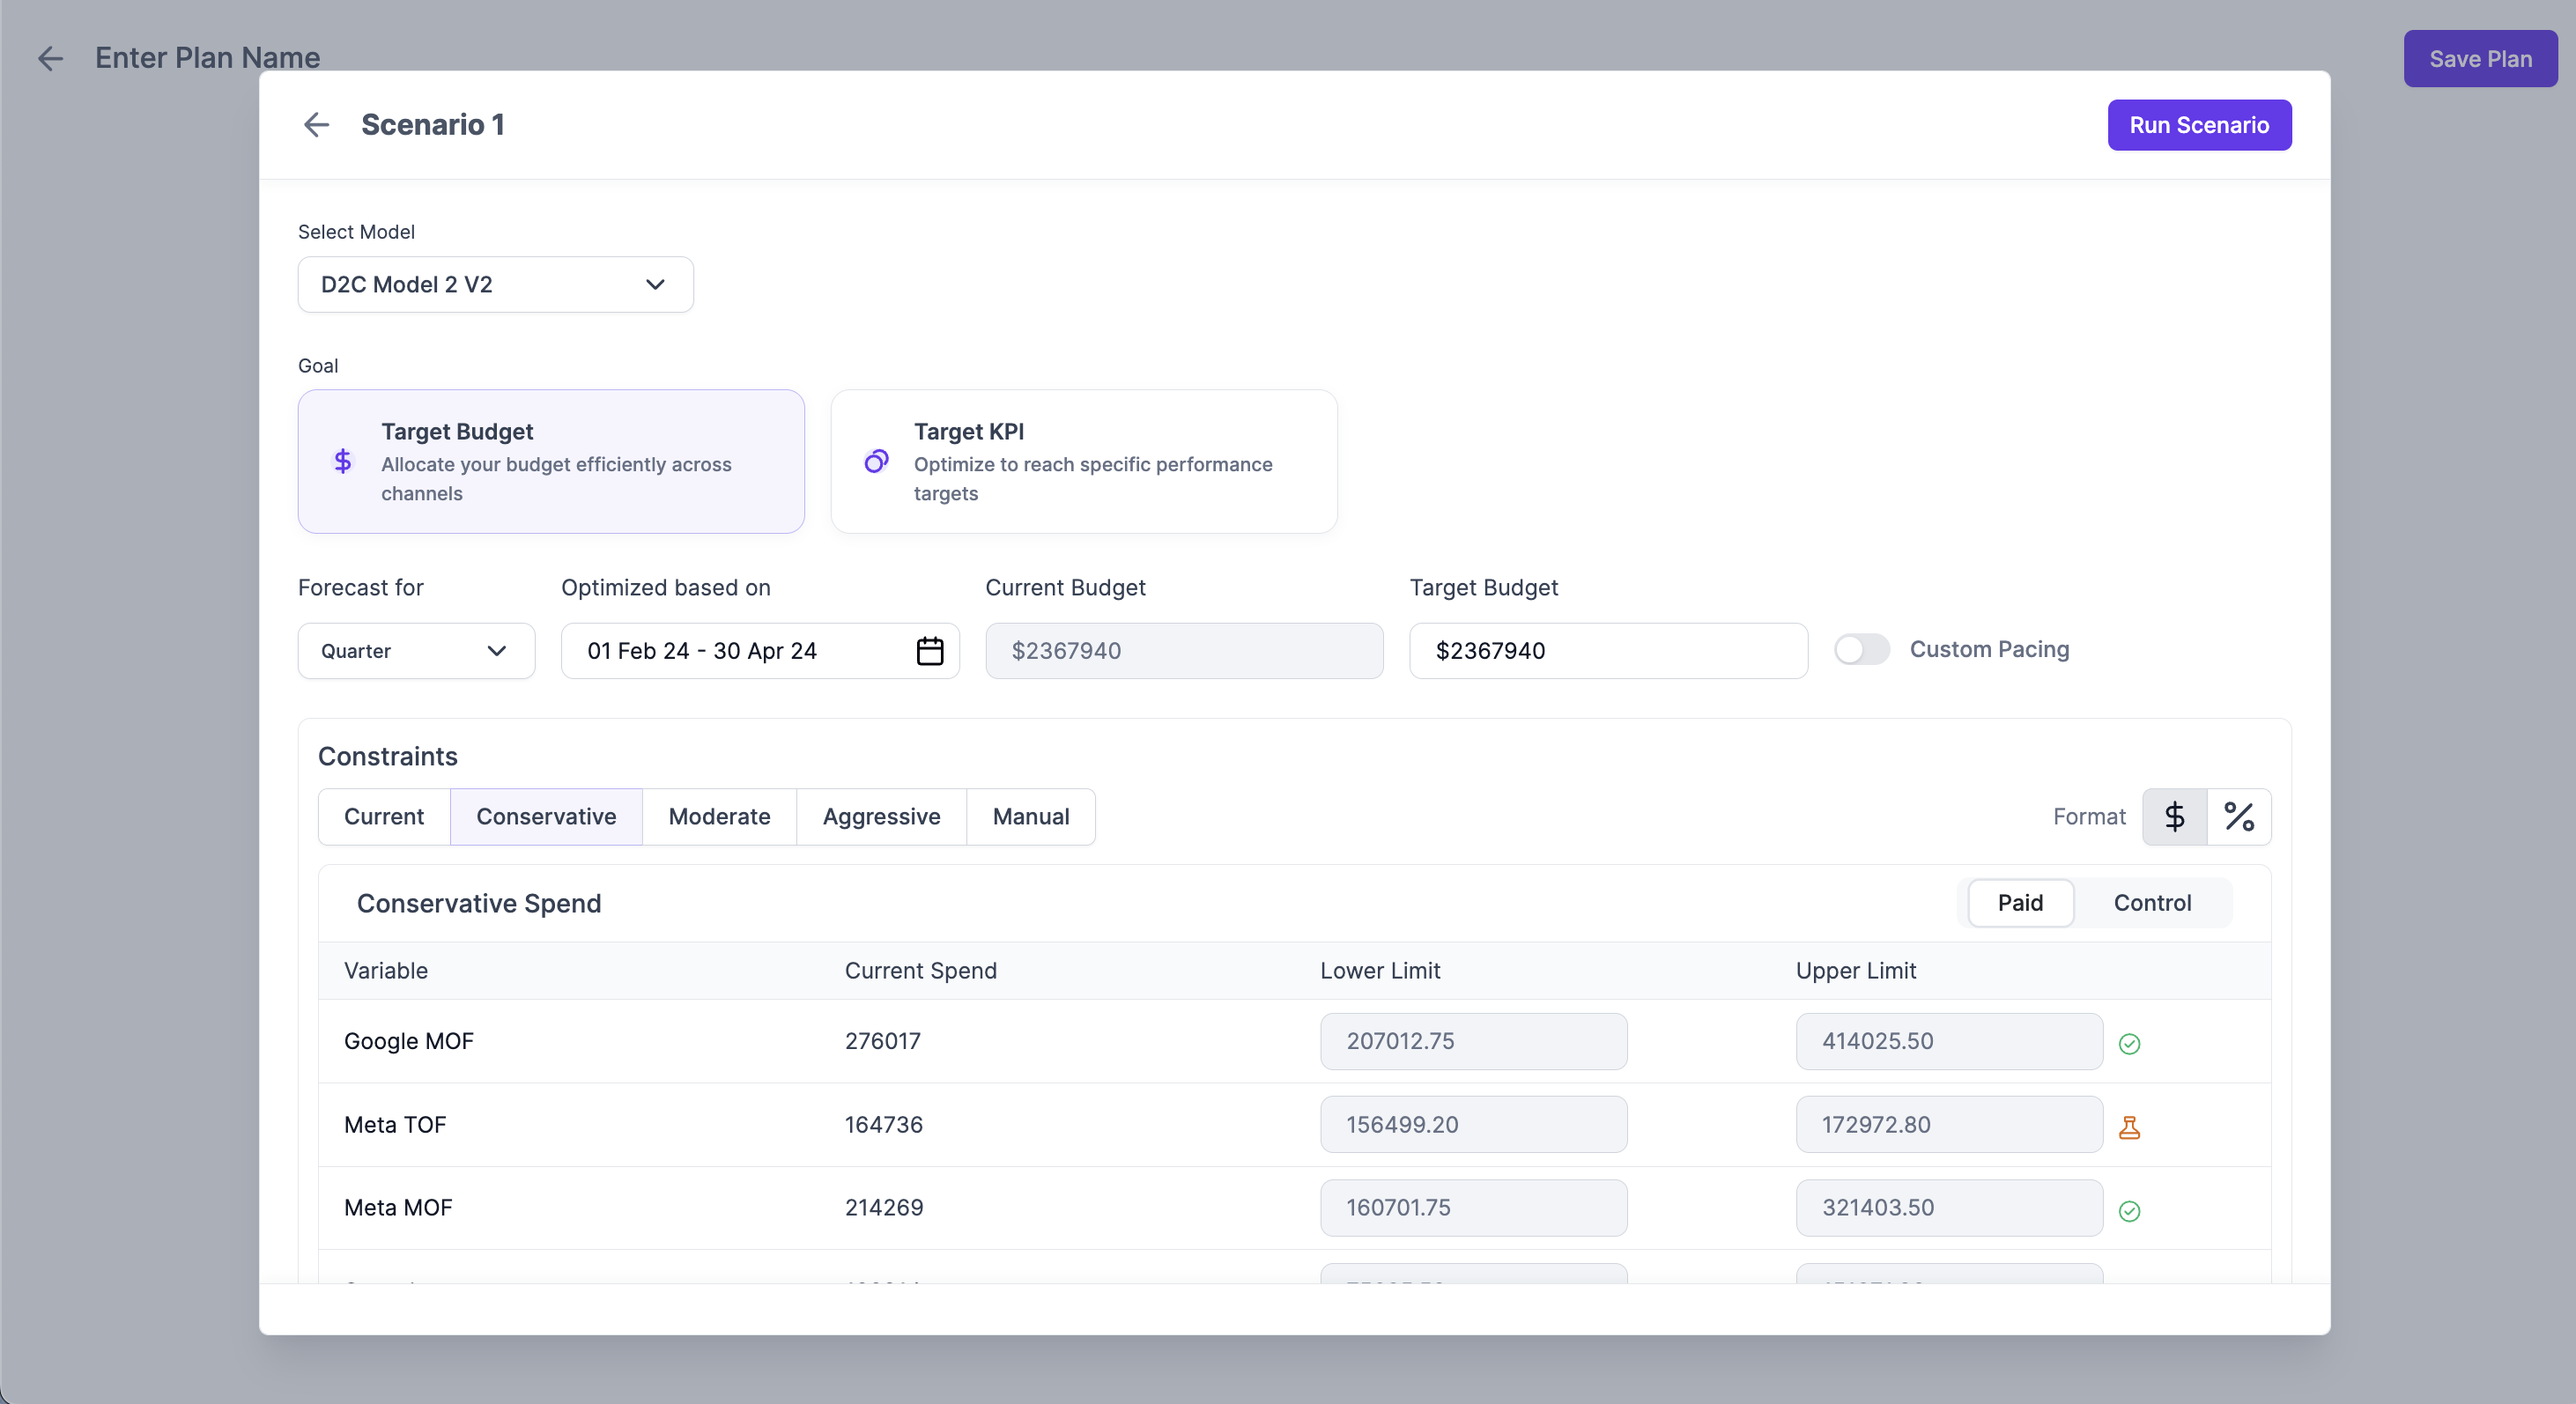
Input the following parameters to generate the first scenario for the plan (which will be fixed across the other scenarios added in the next step)
- Goal: Select the Goal that needs to be accomplished with the plan. Target Budget is typically selected for finding the best allocation for a specific budget and Target KPI is selected for chasing a KPI (eg: Revenue, orders, etc.) goal.
- Set Forecast and Basis Periods: Select the timeframe for the simulation by selecting a "Forecast for" period (e.g., Quarter) and the specific "Optimized based on" date range. This basis period tells the model which historical conditions are most similar to your intended forecast period.
- Target Budget: In the Target Budget field, enter the total amount you want the planner to allocate.
- Custom Pacing: Toggle the custom pacing button to unevenly spread your budget across your plan. Refer to Custom Budget Pacing for a detailed guide
Defining Spend Constraints
Constraints set realistic boundaries for how the scenario planner can allocate your budget. You can use presets or define them manually.
The available modes are:
- Current: Retains the current spend levels and sets the upper & lower limits to ±5% from the current spend levels.
- Conservative: Narrows the spending range, keeping it close to current levels.
- Moderate: Allows for more flexibility in budget allocation than Conservative mode.
- Aggressive: Provides the widest range for budget allocation, allowing the model to explore more dramatic shifts in spending.
- Manual: Allows you to set specific Lower Limit and Upper Limit spend values for each individual channel in the table below.
How Constraints are Determined
- For causally calibrated channels: The scenario planner uses predefined lower and upper budget limits. These limits are used to run revenue simulations without modifying the overall Target Budget you entered.
- For causally uncalibrated channels: The planner applies a ±10% change to the current channel budget allocation. This ensures that the predictions are reliable and backed by clear historical data patterns.
Step 3: Run the Scenario
Once you have configured the goal, budget, and constraints to your satisfaction, click the Run Scenario button in the top-right corner. This will initiate the simulation process, and the platform will use your inputs to calculate the optimal budget allocation and forecast the results.
Updated 10 months ago